ARDUINO developers have made such an option that you can print anything and see it on the Serial monitor.
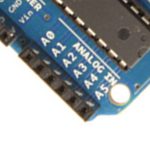
This example demonstrates analog input usage by reading an analog sensor on analog pin 0 and turning on and off a light emitting diode(LED) connected to digital pin 13 and also printing the corresponding ADC value.
The amount of time the LED will be on and off depends on the value obtained by analogRead().
Serial printing is enabled using Serial.begin(baud rate). You can mension the baud rate within the brackets followed by Serial.begin (here 9600).
Serial.print() is used to display the reading.
The circuit coonection is as given below:
- Potentiometer attached to analog input 0
- Center pin of the potentiometer to the analog pin
- One side pin (either one) to ground
- The other side pin to +5V
- LED anode (long leg) attached to digital output 13
- LED cathode (short leg) attached to ground
Note: Pin 13 is mostly preferred for testing purpose because most Arduinos have a built-in LED attached to pin 13 on the board, the LED is optional.
You can see the readings from Serial Monitor. It can be accessed by pressing the shortcut ‘Ctrl+Shift+M’ or you can access it from Tools > serial monitor as shown below.
The programme code is given below :
int sensorPin = A0;    // select the input pin for the potentiometer
int ledPin = 13;      // select the pin for the LED
int sensorValue = 0;  // variable to store the value coming from the sensor

void setup() {
  // start serial port at 9600 bps:
  Serial.begin(9600);
  // declare the ledPin as an OUTPUT:
  pinMode(ledPin, OUTPUT);
}

void loop() {
  // read the value from the sensor:
  sensorValue = analogRead(sensorPin);
  Serial.print(sensorValue);   // print ADC value of analog reading
  // turn the ledPin on
  digitalWrite(ledPin, HIGH);
  // stop the program for  milliseconds:
  delay(sensorValue);
  // turn the ledPin off:
  digitalWrite(ledPin, LOW);
  // stop the program for for  milliseconds:
  delay(sensorValue);
}
You can vary the analog reading by adjusting the potentiometer. This tutorial only helps you to build a basic knowledge about ADC usage in ARDUINO. In spite of this, there are many applications for ADC pins.