
Contents
A PIC Microcontroller can be easily made to communicate with LCD by using the built in Libraries of MikroC. Interfacing between PIC and LCD can be 4-bit or 8-bit. The difference between 4-bit and 8-bit is how data are send to the LCD. In the 8-bit mode to write an 8-bit character to the LCD module, ASCII data is send through the data lines DB0- DB7 and data strobe is given through the E line.
But 4-bit mode uses only 4 data lines. In this mode the 8-bit ASCII data is divided into 2 parts which are send sequentially through data lines DB4 – DB7 with its own data strobe through the E line. The idea of 4-bit communication is to save as much pins that used to interface with LCD. The 4-bit communication is a bit slower when compared to 8-bit. The speed difference is only minimal, as LCDs are slow speed devices the tiny speed difference between these two modes is not significant. Thus the 4-bit mode data transmission is most commonly used.
MikroC Pro LCD Library
MikroC Pro provides built in libraries for interfacing LCDs with HD44780 compliant controllers using 4 bit mode data transmission.
Defining LCD Connections
For the proper functioning of the LCD library, you must define, how the pins of LCD are connected to pic microcontroller as given below.
// LCD module connections
sbit LCD_RS at RC2_bit;
sbit LCD_EN at RC3_bit;
sbit LCD_D4 at RC4_bit;
sbit LCD_D5 at RC5_bit;
sbit LCD_D6 at RC6_bit;
sbit LCD_D7 at RC7_bit;
sbit LCD_RS_Direction at TRISC2_bit;
sbit LCD_EN_Direction at TRISC3_bit;
sbit LCD_D4_Direction at TRISC4_bit;
sbit LCD_D5_Direction at TRISC5_bit;
sbit LCD_D6_Direction at TRISC6_bit;
sbit LCD_D7_Direction at TRISC7_bit;
// End LCD module connections
The above definitions tells the compiler, how LCD is connected to the microcontroller. The two set of definitions are used to provide Data (PORT) and Direction (TRIS) registers.
Library Functions
Lcd_Init
Prototype : void Lcd_Init();
This function initializes the LCD module connected to the above defined pins of the PIC Microcontroller.
Lcd_Out
Prototype : void Lcd_Out(char row, char column, char *text);
This functions prints the text (string) in a particular row and column.
Lcd_Out_Cp
Prototype : void Lcd_Out_Cp(char *text);
This function prints the text (string) in the current cursor position. When we write data to LCD Screen, it automatically increments the cursor position.
Lcd_Chr
Prototype : void Lcd_Chr(char row, char column, char out_char);
It prints the character (out_char) in the specified row and column of the LCD Screen.
Lcd_Chr_Cp
Prototype : void Lcd_Chr_Cp(char out_char);
It prints the character (out_char) in the current cursor position.
Lcd_Cmd
Prototype : void Lcd_Cmd(char out_char);
This function is used to send commands to LCD. You can use any one of the following constants as command.
- _LCD_TURN_ON – Turns ON the LCD Display.
- _LCD_TURN_OFF – Turns OFF the LCD Display.
- _LCD_FIRST_ROW – Moves the cursor to the first row.
- _LCD_SECOND_ROW – Moves the cursor to the the second row.
- _LCD_THIRD_ROW – Moves the cursor to the third row.
- _LCD_FOURTH_ROW – Moves the cursor to the fourth row.
- _LCD_CLEAR – Clears the LCD Display.
- _LCD_CURSOR_OFF – Turns ON the cursor.
- _LCD_UNDERLINE_ON – Turns ON the cursor underline.
- _LCD_BLINK_CURSOR_ON – Turns ON the cursor blink.
- _LCD_MOVE_CURSOR_LEFT – Moves cursor LEFT without changing the data.
- _LCD_MOVE_CURSOR_RIGHT – Moves cursor RIGHT without changing the data.
- _LCD_SHIFT_LEFT – Shifts the display left without changing the data in the display RAM.
- _LCD_SHIFT_RIGHT – Shifts the display right without changing the data in the display RAM.
- _LCD_RETURN_HOME – Returns the cursor and shifted display to Home position.
LCD Interfacing
MikroC Pro Code
// LCD module connections
sbit LCD_RS at RC2_bit;
sbit LCD_EN at RC3_bit;
sbit LCD_D4 at RC4_bit;
sbit LCD_D5 at RC5_bit;
sbit LCD_D6 at RC6_bit;
sbit LCD_D7 at RC7_bit;
sbit LCD_RS_Direction at TRISC2_bit;
sbit LCD_EN_Direction at TRISC3_bit;
sbit LCD_D4_Direction at TRISC4_bit;
sbit LCD_D5_Direction at TRISC5_bit;
sbit LCD_D6_Direction at TRISC6_bit;
sbit LCD_D7_Direction at TRISC7_bit;
// End LCD module connections
void main()
{
Lcd_Init(); // Initialize LCD
Lcd_Cmd(_LCD_CLEAR); // Clear display
Lcd_Cmd(_LCD_CURSOR_OFF); // Cursor off
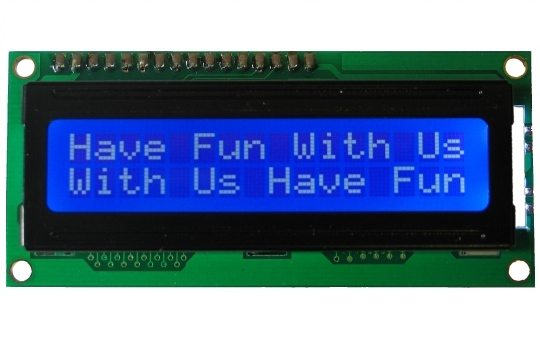
Lcd_Out(1,1,"Hello World");//Write text'Hello World' in first row
}
Circuit Diagram

Download
You can download MikroC files and Proteus files here…