Contents
8051 Microcontroller is a programmable device which is used for controlling purpose.
Basically 8051 controller is Mask programmable means it will programmed at the time of manufacturing and will not programmed again, there is a derivative of 8051 microcontroller, 89c51 micro controller which is re-programmable.
89c51 is 8-bit device means it is capable of doing 8-bit operations. It have 4 ports which are used as input or output according to your need.
This device also have Timer, Serial Port interface and Interrupt controlling you can use these according to your need. The datasheet may be downloaded from here.
8051 Ports Explained


Using Keil uVision 4
1. Download and Install Keil uVision4
2. Open Keil uVision

3. Create a new Project : Project >> Create µVision Project

4. Browse for the location
5. Select the microcontroller Atmel>>AT89C51
6. Don’t Add The 8051 startup code
7. File>>New
8. Adding Hex file to the output

Right click on Target1>>options for target “target 1”
In the Output Tab check the “Create HEX file” box<
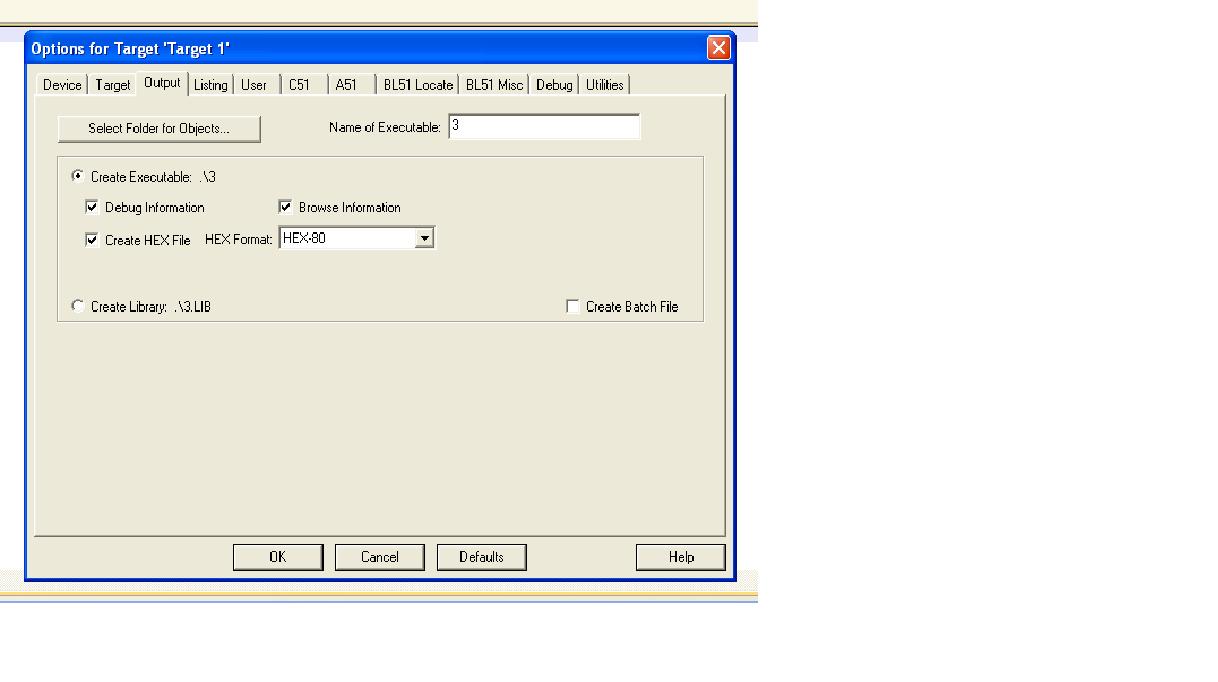
- To change the operating frequency goto Target tab on the window obtained by right clicking on Target1>>options for target “target 1”
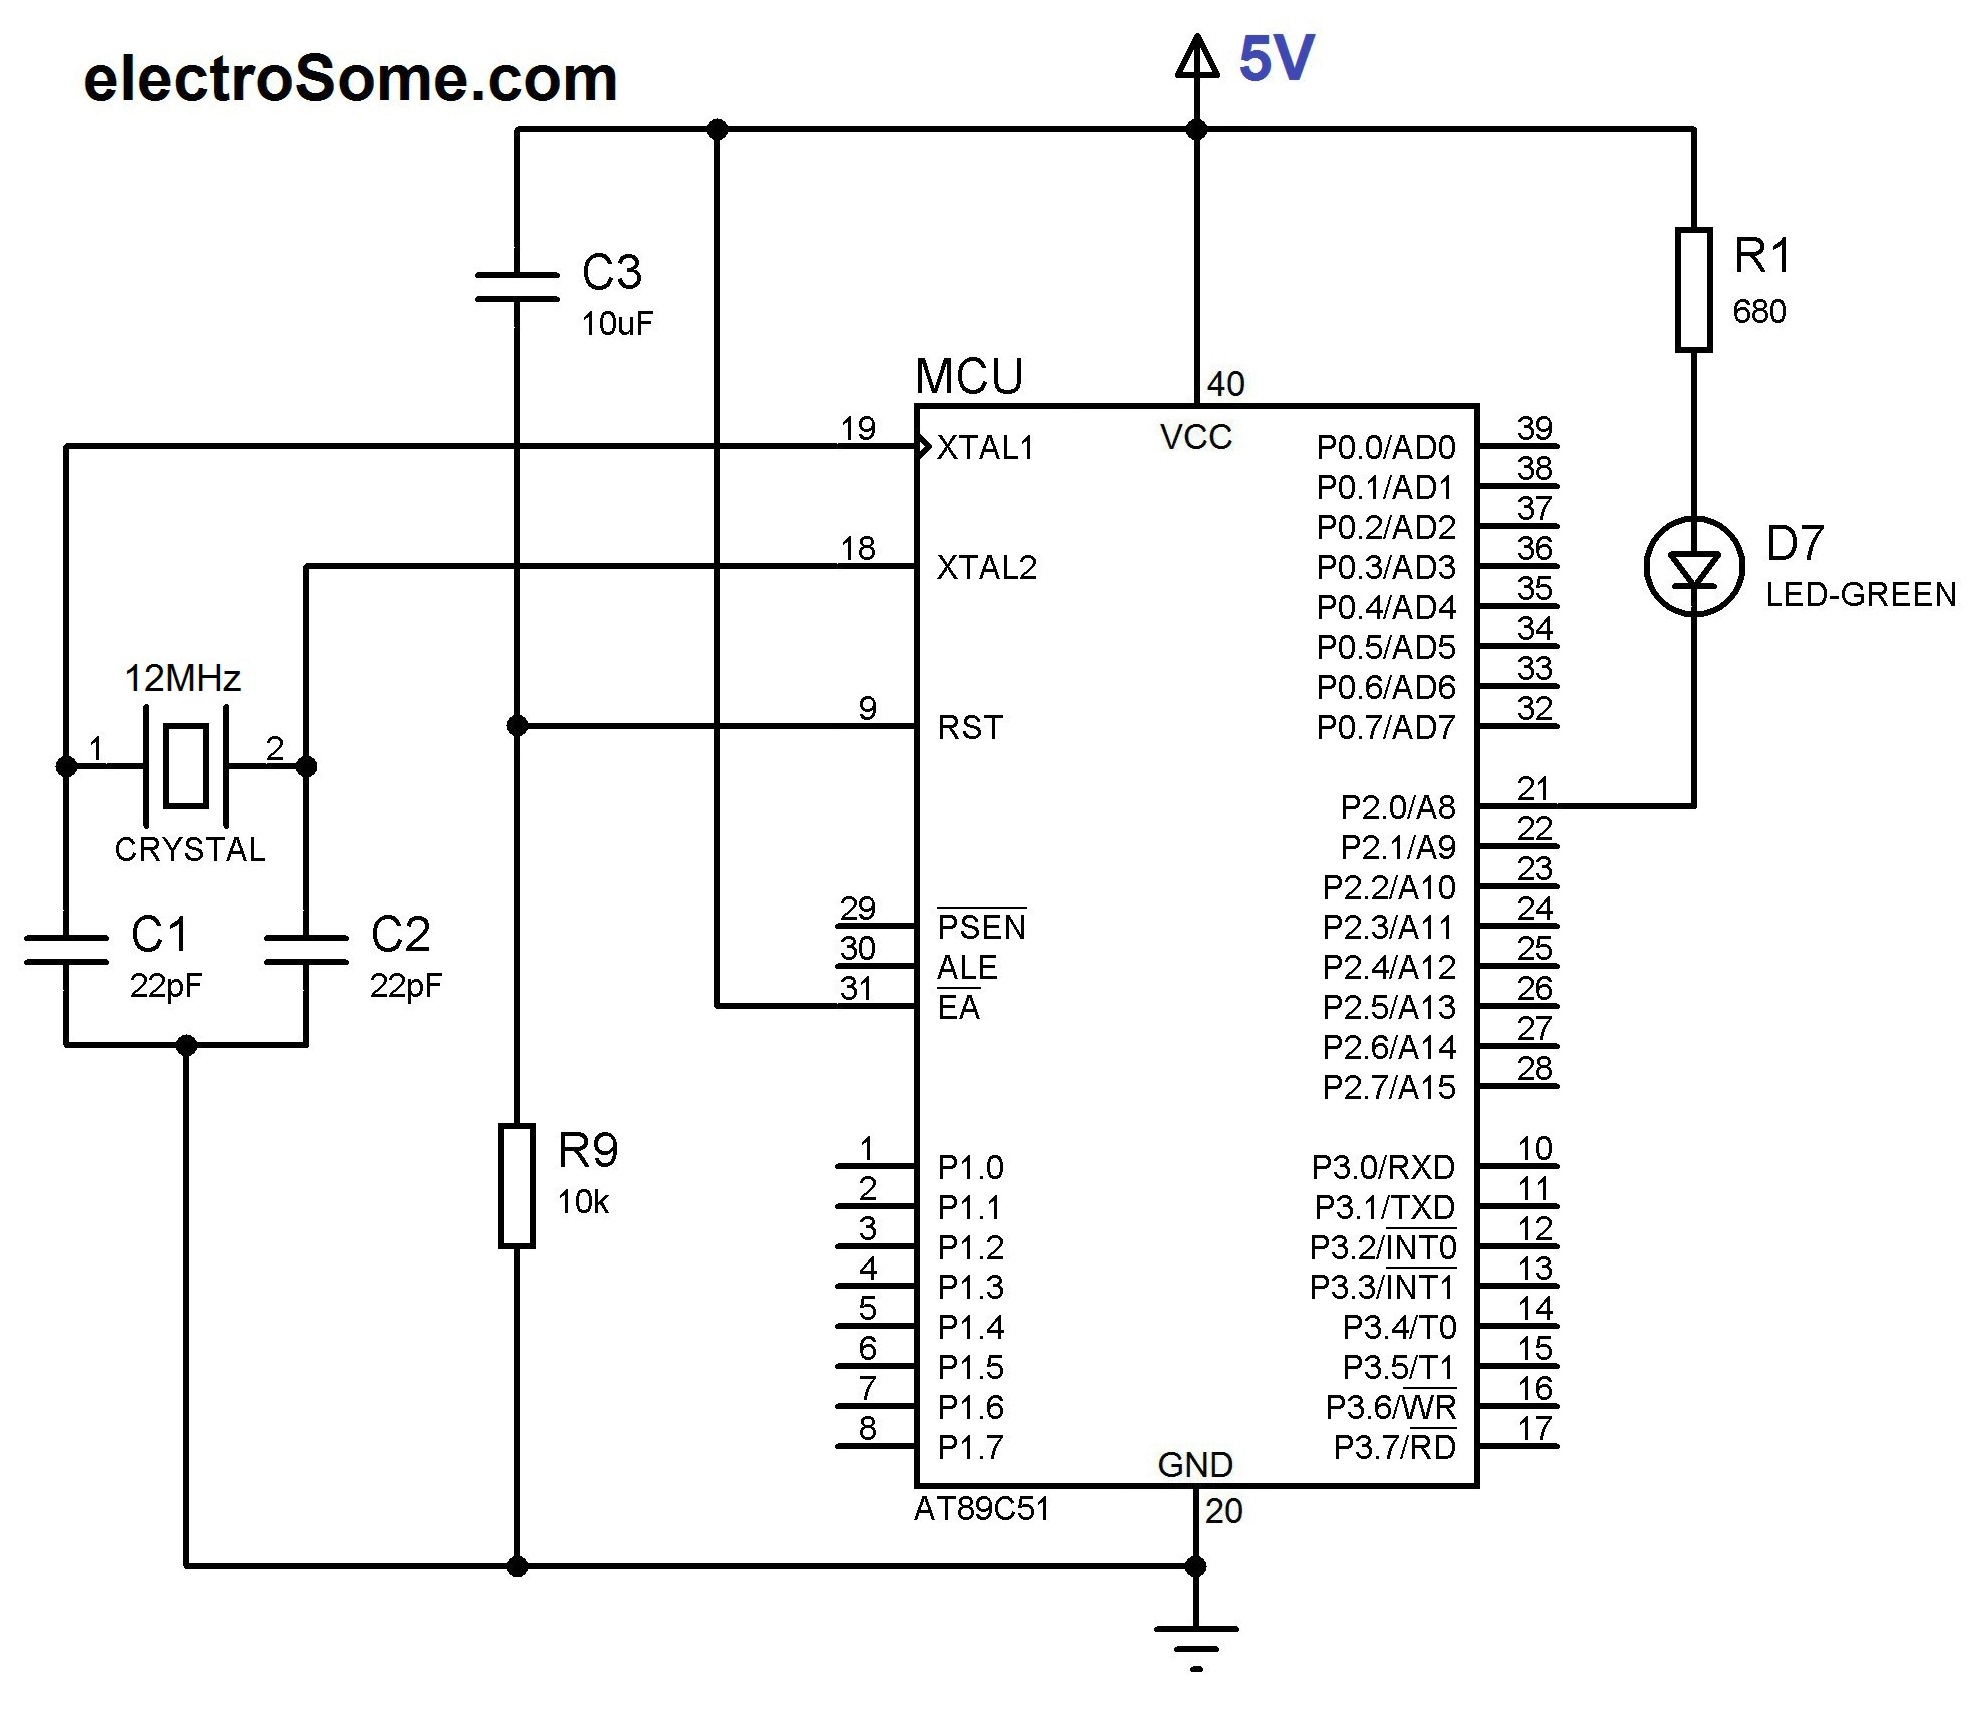
Circuit Diagram
Keil C Program
#include<reg52.h>           // special function register declarations
                            // for the intended 8051 derivative

sbit LED = P2^0;            // Defining LED pin

void Delay(void);           // Function prototype declaration

void main (void)
{
    while(1)                // infinite loop
    {
        LED = 0;            // LED ON
        Delay();
        LED = 1;            // LED OFF
        Delay();
    }
}

void Delay(void)
{
    int j;
    int i;
    for(i=0;i<10;i++)
    {
        for(j=0;j<10000;j++)
        {
        }
    }
}
1. Enter the source code.
2. Save it
3. Then Compile it. Click Project>>Build Target or F7
The hex file will be generated in your Project Folder.
AT89C51 needs an oscillator for its clock generation, so we should connect external oscillator. Two 22pF capacitors are used to stabilize the operation of the Crystal Oscillator. EA should be strapped to VCC for internal program executions. AT89C51 has no internal Power On Reset, so we have to do it externally through the RST pin using Capacitor and Resistor. When the power is switched ON, voltage across capacitor will be zero, thus voltage across resistor will be 5V and reset occurs. As the capacitor charges voltage across the resistor gradually reduces to zero.
This pin also receives the 12-volt programming enable voltage (VPP) during Flash programming, for parts that require
12-volt VPP.
The circuit may be simulated using Proteus. If you haven’t yet started with Proteus, please go through this tutorial. You can buy Proteus from Labcenter Electronics.
Download Here
You can the entire Keil C project files here.