Electronics hobby, educational or college projects made using Arduino with circuit diagram, program code and detailed working explanation. 100% working and tested circuits.

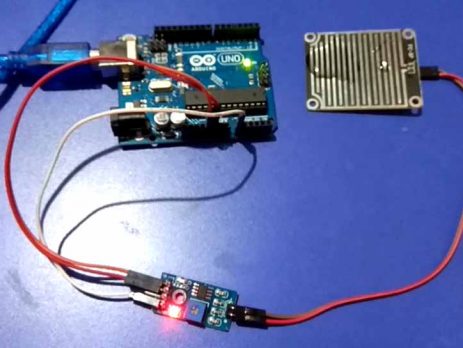
Interfacing Soil Moisture Sensor with Arduino

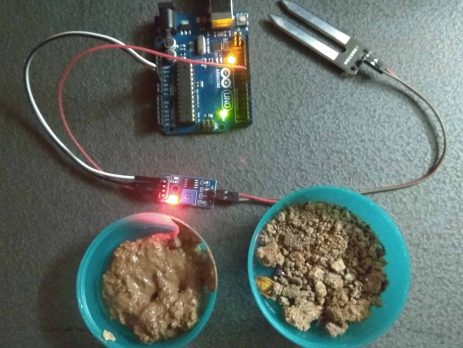
Introduction In this article, we are going to interface a Soil Moisture Sensor with Arduino Uno. We will measure the moisture content of soil in pot or farming field and by using this we can pour water into field based on preset values. This sensor measures the volumetric content of water inside the soil (based on resistance/conductivity) and gives the moisture level as output. The sensor is equipped with both analog and digital output, so it can be used in both analog...

Interfacing Rain Sensor with Arduino

In this article we are going to explain about interfacing Rain Sensor with Arduino. The rain sensor module is an easy tool for rain detection. It operates as a switch when raindrop falls through the raining board and also it measures rainfall intensity. The module features, a rain sensing board and the control board that is separate for more convenience, power indicator LED and an adjustable sensitivity though a potentiometer. Rain Sensor Module Raindrop sensor is basically a board on which nickel...

Controlling LED’s using IR Remote Control – Arduino Project

This article allows you to turn ON and OFF LED's using a cheap IR remote control. Here we used an available IR Arduino library so it was pretty easy to decode the signals transmitted by the infrared remote. The LED's which are connected to Arduino will be controlled by IR Transceiver module. IR Transmitter i.e., Remote transmits unique code to IR sensor wirelessly. IR sensor receives that signal and controls the LED's which are connected to Arduino according to Code. Required Components IR sensor Arduino...

Controlling of DC Motors using MPU-6050

In this project, we are going to control the speed of 2 DC motors using the MPU-6050. MPU-6050 is an accelerometer and Gyro sensor. By moving the sensor in upward or downward direction, the speed of the motors will increase or decrease. By moving the sensor in upward direction, the speed of first motor will increase and the speed of other motor will decrease. Similarly, by moving the sensor in downward direction, the speed of first motor will increase and the...

Making Ethernet Web Server with Arduino

Build your own IOT service! Collect sensor data and send it to a WebServer. In this article, we are going to create a webserver using the Arduino and the Ethernet shield. The Arduino Ethernet makes everything so easy that it looks like magic. The Arduino Ethernet Shield allows you to easily connect Arduino to the internet. This shield enables Arduino to send and receive data from anywhere in the world with an internet connection. This shield opens up endless amounts of...

Web Controlled Servo Motor – Arduino – IoT Project

Internet of things has taken over all the heavy loads from human to itself. IoT is an ecosystem of connected physical objects that are accessible through the internet. As Automation is used to help mankind in various environments if we combine the automation and Internet of things we can achieve more than we can think of. In this project, we are going to control the servo motor from webpage by using Arduino Uno. The webpage will be created using ESP8266 module. The servo...

Calculator using Arduino Uno

Arduino Uno has always helped to build projects easily and make them look more attractive. In this project, we are going to make an Arduino Uno calculator which will take the values from user by using the 4X4 keypad and then will perform the calculations to get the result. After calculating the result, it will print those calculated values on Nokia 5110 LCD. This Arduino Uno based calculator can perform four operations which are addition, subtraction, multiplication and division. Components Required Arduino...

Controlling DC Motors using Arduino and IR Remote

In this project we will learn how to decode IR remote signals with Arduino and to control DC motors depending on the button pressed. For demonstrating the working we are using five buttons on the remote. When the next button on the remote is pressed, motors will rotate in clockwise direction. And if the previous button is pressed motors will rotate in anticlockwise direction. We can also control these two motors individually using left, right arrow buttons and stop button...

>