Calculator using Arduino Uno
Contents
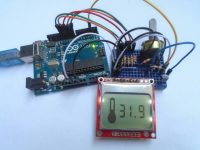
Arduino Uno has always helped to build projects easily and make them look more attractive. In this project, we are going to make an Arduino Uno calculator which will take the values from user by using the 4X4 keypad and then will perform the calculations to get the result. After calculating the result, it will print those calculated values on Nokia 5110 LCD. This Arduino Uno based calculator can perform four operations which are addition, subtraction, multiplication and division.
Components Required
- Arduino Uno
- Nokia 5110 84X48 LCD
- 4X4 Keypad
- 1k Potentiometer
- 4x 10kΩ Resistors
- 330Ω Resistor
- 1kΩ Resistor
- Connecting wires
Hardware
Circuit Diagram
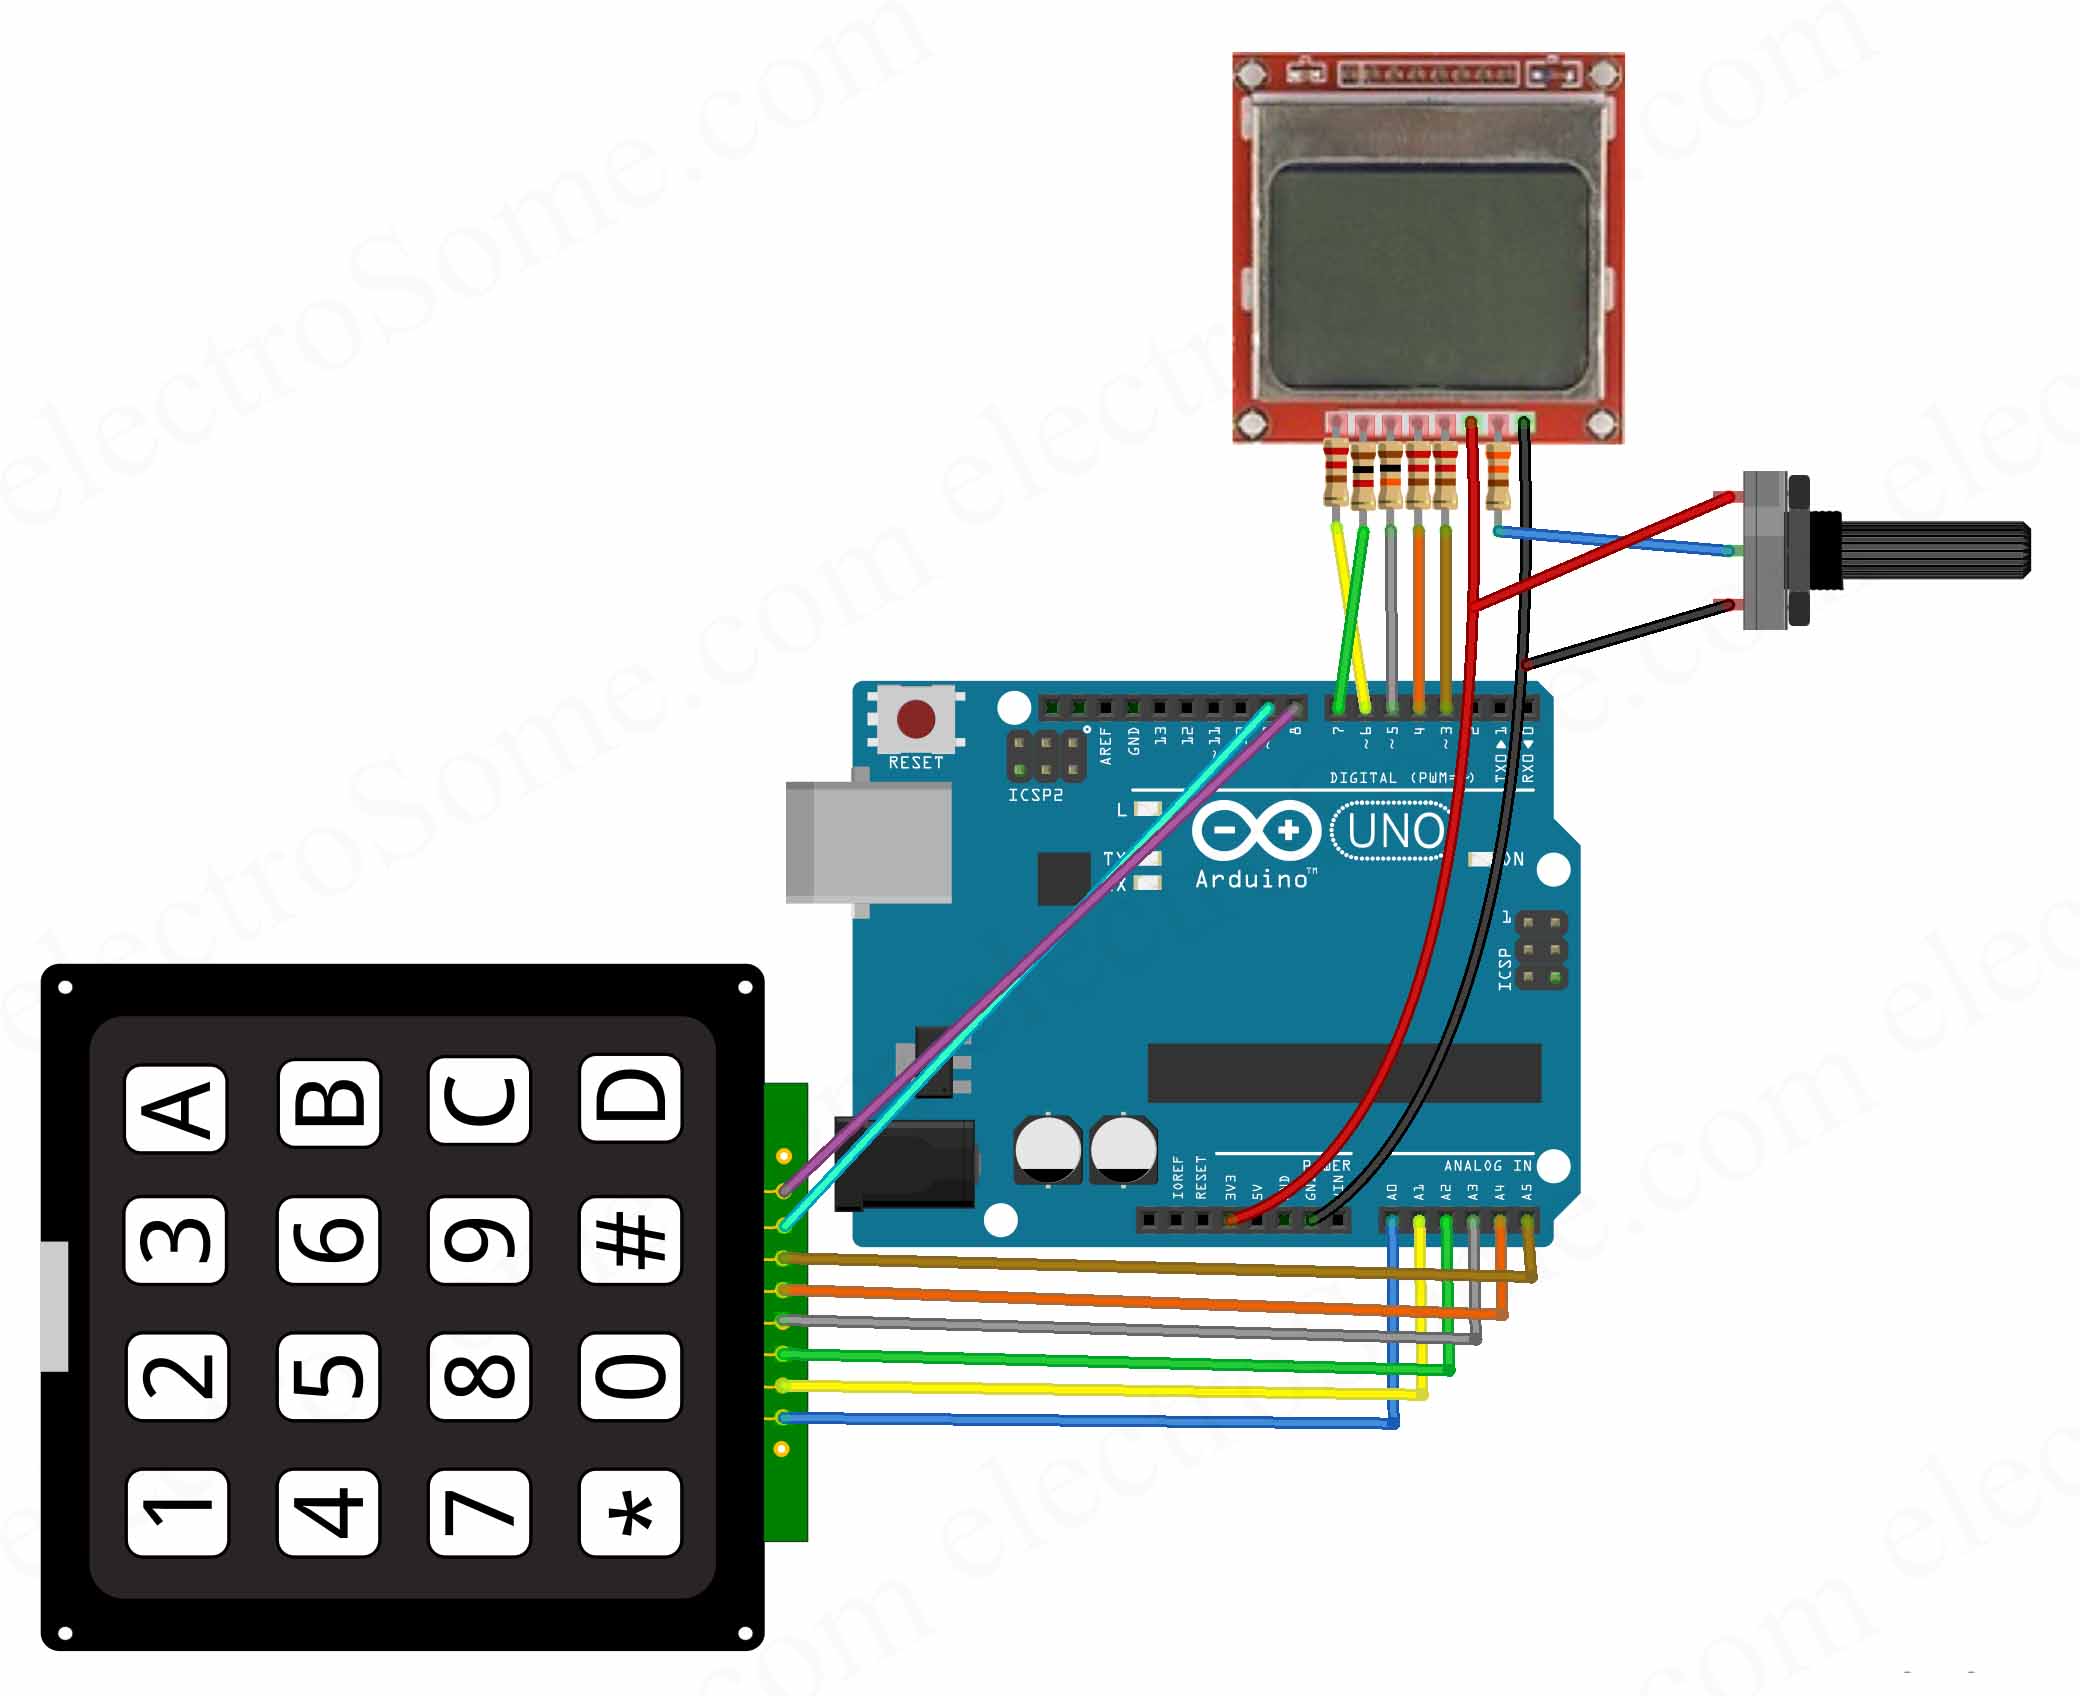
Circuit Explanation
The connections of the Nokia 5110 LCD with the Arduino are as follows
- Connect the GND Pin of Nokia 5110 LCD to GND pin of Arduino Uno.
- Connect the LED Pin of Nokia 5110 LCD to the middle pin of 1k potentiometer through 330Ω resistor and connect the other two pins of the potentiometer to the VCC and GND.
- Connect the VCC Pin of Nokia 5110 LCD to the 3.3V pin of Arduino Uno.
- Connect the CLK Pin of Nokia 5110 LCD to the pin 3 of Arduino Uno via 10KΩ resistor.
- Connect the DIN Pin of Nokia 5110 LCD to the pin 4 of Arduino Uno via 10KΩ resistor.
- Connect the D/C Pin of Nokia 5110 LCD to the pin 5 of Arduino Uno via 10KΩ resistor.
- Connect the SCE Pin of Nokia 5110 LCD to the pin 7 of Arduino Uno via 1KΩ resistor.
- Connect the RST Pin of Nokia 5110 LCD to the pin 6 of Arduino Uno via 10KΩ resistor.
To make the connections of the 4X4 Keypad with the Arduino, connect the first six pins of 4X4 keypad with the A0 to A5 of Arduino Uno and connect the pin 7 and 8 of 4X4 keypad to the pin 9 and 8 of Arduino Uno respectively.
Software
Arduino Uno Program
#include <Keypad.h>
#include<EEPROM.h>
#include <PCD8544.h>
PCD8544 Nokia_lcd;
const byte ROWS = 4;
const byte COLS = 4;
char Button_pressed;
char keys [ROWS] [COLS] = {
                            {'1', '2', '3', '+'},
                            {'4', '5', '6', '-'},
                            {'7', '8', '9', 'C'},
                            {'=', '0', '*', '/'}
                          };
byte rowPins[ROWS] = {A0,A1,A2,A3}; //connect to the row pinouts of the keypad
byte colPins[COLS] = {A4,A5,9,8};   //connect to the column pinouts of the keypad
Keypad myKeypad = Keypad( makeKeymap(keys), rowPins, colPins, ROWS, COLS );
boolean presentValue = false;
boolean next = false;
boolean final = false;
String first_number, second_number;
int result;
char op;

void setup()
{
  Nokia_lcd.begin(84, 48);
  Nokia_lcd.setCursor(0,0);
  Nokia_lcd.print(" Arduino based  ");
  Nokia_lcd.setCursor(0,1);
  Nokia_lcd.print("  Calculator"    );
  delay(1000);
  Nokia_lcd.clear();
}

void loop()
{
  Button_pressed = myKeypad.getKey();
  Nokia_lcd.setCursor(0,0);
  Nokia_lcd.print("1st N0=   ");
  getnumber();
  operators();
  answer();
  clearC();
}

void getnumber()
{
if (Button_pressed != NO_KEY && (Button_pressed=='1'||Button_pressed=='2'||Button_pressed=='3'||Button_pressed=='4'||Button_pressed=='5'||Button_pressed=='6'||Button_pressed=='7'||Button_pressed=='8'||Button_pressed=='9'||Button_pressed=='0'))
  {
    if (presentValue != true)
      {
        first_number = first_number + Button_pressed;
        int numLength = first_number.length();
        Nokia_lcd.println(first_number);
      }
    else
      {
        second_number = second_number + Button_pressed;
        int numLength = second_number.length();
        Nokia_lcd.setCursor(0,2);
        Nokia_lcd.print("2nd N0=   ");
        Nokia_lcd.print(second_number);
        final = true;
      }
  }
}

void operators()
{
  if (presentValue == false && Button_pressed != NO_KEY && (Button_pressed == '/' || Button_pressed == '*' ||              Button_pressed == '-' || Button_pressed == '+'))
    {
      if (presentValue == false)
        {
          presentValue = true;
          op = Button_pressed;
          Nokia_lcd.setCursor(0,1);
          Nokia_lcd.print("Operator= ");
          Nokia_lcd.print(op);
          Nokia_lcd.setCursor(0,2);
          Nokia_lcd.print("2nd N0= ");
        }
    }
}

void answer()
{
  if (final == true && Button_pressed != NO_KEY && Button_pressed == '=')
    {
      if (op == '+')
        {
          result = first_number.toInt() + second_number.toInt();
        }
      else if (op == '-')
        {
          result = first_number.toInt() - second_number.toInt();
        }
      else if (op == '*')
        {
          result = first_number.toInt() * second_number.toInt();
        }
      else if (op == '/')
        {
          result = first_number.toInt() / second_number.toInt();
        }
      Nokia_lcd.setCursor(0,3);
      Nokia_lcd.print("Result=   ");
      Nokia_lcd.print(result);
    }
}

void clearC()
{
  if (Button_pressed != NO_KEY && Button_pressed == 'C')
    {
      Nokia_lcd.clear();
      presentValue = false;
      final = false;
      first_number = "";
      second_number = "";
      result = 0;
      op = ' ';
    }
}
Code Explanation
First of all, we have added the libraries for keypad, EEPROM and Nokia 5110 LCD. The EEPROM library will store the information of pressed button. After that, we declared a variable for Nokia 5110 LCD named ‘Nokia_lcd’ of type PCD8544. This variable will help us in displaying the data on Nokia 5110 LCD.
#include <Keypad.h>
#include<EEPROM.h>
#include <PCD8544.h>
PCD8544 Nokia_lcd;
In the setup function, first initialize a Nokia 5110 LCD and begin a communication between Arduino and Nokia 5110 LCD. The resolution of the Nokia 5110 LCD is 84 X 48. Set the cursor point and then print ‘Arduino Based Calculator’ on the LCD.
Nokia_lcd.begin(84, 48);
Nokia_lcd.setCursor(0,0);
Nokia_lcd.print(" Arduino based  ");
Nokia_lcd.setCursor(0,1);
Nokia_lcd.print("  Calculator"    );
delay(1000);
Whenever a key will be pressed, then that pressed key information will be stored in the ‘button_pressed’ variable. Then the Arduino Unoo will execute the other functions and will calculate the result.
Button_pressed = myKeypad.getKey();
Nokia_lcd.setCursor(0,0);
Nokia_lcd.print("1st N0=   ");
getnumber();
operators();
answer();
clearC();
In the getnumber function, it looks for the key which is pressed. While finding the key, it will store this in the ‘first_number’ variable and will print it on the LCD. If it already has received the key, then it will look for the second number and will store it in the ‘second_number’ variable.
void getnumber()
{
  if (Button_pressed != NO_KEY && (Button_pressed=='1'||Button_pressed=='2'||Button_pressed=='3'||Button_pressed=='4'||Button_pressed=='5'||Button_pressed=='6'||Button_pressed=='7'||Button_pressed=='8'||Button_pressed=='9'||Button_pressed=='0'))
    {
      .
      .
      .
      Nokia_lcd.print("2nd N0=   ");
      Nokia_lcd.print(second_number);
      final = true;
    }
}
In the operator function, it looks for which operator button is pressed and it will display that pressed operator on LCD.
void operators()
{
  if (presentValue == false && Button_pressed != NO_KEY && (Button_pressed == '/' || Button_pressed == '*' || Button_pressed == '-' || Button_pressed == '+'))
    {
      if (presentValue == false)
        {
          presentValue = true;
          op = Button_pressed;
          Nokia_lcd.setCursor(0,1);
          Nokia_lcd.print("Operator= ");
          Nokia_lcd.print(op);
          Nokia_lcd.setCursor(0,2);
          Nokia_lcd.print("2nd N0= ");
        }
    }
}
In the answer function, it will first check that if the ‘=’ button is pressed or not. If it is pressed, then it will calculate the result and displays it on LCD.
void answer()
{
  if (final == true && Button_pressed != NO_KEY && Button_pressed == '=')
    {
      if (op == '+')
        {
          result = first_number.toInt() + second_number.toInt();
        }
      else if (op == '-')
        {
          result = first_number.toInt() - second_number.toInt();
        }
      else if (op == '*')
        {
          result = first_number.toInt() * second_number.toInt();
        }
      else if (op == '/')
        {
          result = first_number.toInt() / second_number.toInt();
        }
    }
}
Working
The Arduino Uno continuously monitors the keypad in order to detect a pressed button. Whenever we press a button in a keypad, then Arduino Uno will check that which button has pressed. If the pressed button is an integer, then Arduino Uno stores that button(number) information and displays on LCD. If the pressed button is not an integer, then it won’t do anything.
After that, it will look for the operator button to be pressed. If the operator button has pressed, then it will look for the second number. Whenever we press a second number, then this will store that button (number) information and displays on LCD.
After receiving the first and second numbers and operator, it will look for the equal sign to be pressed. Whenever the equal button has pressed, then it performs the calculations and displays the result on Nokia 5110 LCD.