Tutorials

Electronics tutorials including microcontroller, microprocessor, programing and circuits. Intended for beginners, electronics hobbyists, college students, professionals and educational purposes.

CloudX – Writing to PORTs

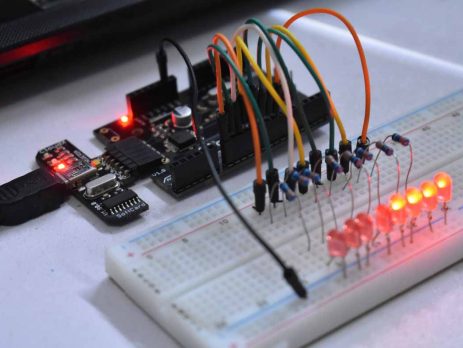
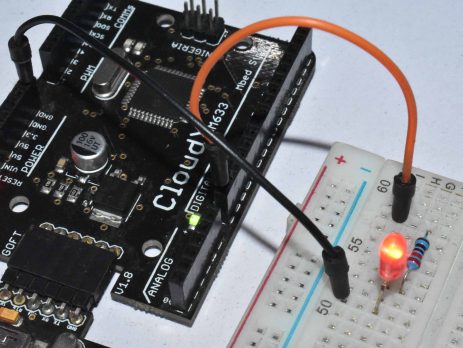
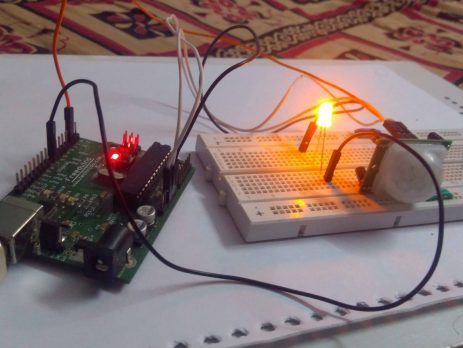
In the previous tutorial we saw how to blink an LED using CloudX board, but in some projects we might need to write to a PORT or a group of pins at the same time. For eg., for designing an 8 LED chaser, writing to pins one after the other makes your code look so bulky but writing to a PORT at once for this kind of projects will make your code look neat and more efficient. A PORT is a...

Getting Started with CloudX Development Board

CloudX M633 is one of the popular PIC based microcontroller development board designed by ByteHub Embedded, it comes with over 500 library functions which makes it very easy for beginners to start with embedded systems. In this tutorial we will see how to write our first "Hello World" program to blink an LED using the popular CloudX M633 (PIC16F877A chip) development board. CloudX - PIC Microcontroller Development Board and SoftCard Components Required CloudX Microcontroller Board and SoftCard Light Emitting Diode (LED) Resistor...

ESP8266 as MQTT Client – Arduino IoT

IoT or Internet of Things is an emerging technology which enables us to create a network of devices, sensors, actuators to connect and exchange data. MQTT (Message Queuing Telemetry Transport) is one of the commonly used protocol in this field. It consists of MQTT Broker and MQTT Clients. Where MQTT Broker is the server through which all MQTT Clients are communicating each other. CloudMQTT provides MQTT Broker as a service, which we are using in this tutorial. In this project we...

How to change Hostname of OpenWrt ?

Sometimes you may need to change the hostname of your OpenWrt. Host name is stored in the system configuration file. You can view it in the following command. cat /etc/config/system System Configuration - OpenWrt It is very easy to change hostname of OpenWrt, using following commands. Here we are changing our hostname to "electroSome". uci set system.@system[0].hostname='electroSome' uci commit system /etc/init.d/system reload Changing Hostname of OpenWrt

Getting Started with OpenWrt C Programing

In this tutorial we will learn how to cross compile a C program for OpenWrt. Cross compiling a C program for OpenWrt is a little complicated task for beginners. So I thought of writing a detailed tutorial for it. Please feel free to comment below if you have any doubts or you want to add anything more to this article. OpenWrt Prerequisite You need a linux system for making the OpenWrt build environment. We are using Ubuntu in this tutorial. Windows 10 users...

Calling API using ESP8266

The objective of this tutorial is to explain how to do HTTP JSON GET requests using an ESP8266 and Arduino IDE. Components Required ESP8266 USB Cable Hardware Connect ESP8266 to Computer   Software Code #include <ESP8266WiFi.h> #include <ESP8266HTTPClient.h> #include <ArduinoJson.h> const char* ssid = "SERVER NAME"; const char* password = "SERVER PASSWORD"; void setup() { Serial.begin(115200); WiFi.begin(ssid, password); while (WiFi.status() != WL_CONNECTED) { delay(1000); Serial.println("Connecting..."); } } void loop() { if (WiFi.status() == WL_CONNECTED) { HTTPClient...

Interfacing GPS with Arduino

GPS stands for Global Positioning System. GPS module find the location (latitude, longitude, altitude) by comparing the time taken for receiving signals from satellites in its vicinity. GPS offers a great accuracy and also provides other data besides position coordinates. Components Required Arduino Uno GPS Breadboard Connecting Wires Hardware Circuit Diagram Interfacing GPS with Arduino - Circuit Diagram Connections Connect TX pin of GPS Module to pin number 4 of Arduino Uno. Connect RX pin of GPS Module to pin number 3 of Arduino Uno. Connect Red wire...

Interfacing PIR Motion Sensor with Arduino

A PIR sensor is generally known to the world as a motion sensor or motion detector. So in this project we are going to use the PIR motion sensor to detect motion. Here we are going to sense movement of human by using Passive infrared sensor (PIR sensor). Using the feedback from the sensor we will control an LED with the help of Arduino Uno. Components Required Arduino Uno PIR Sensor 330Ω Resistor LED Breadboard Connecting Wires Hardware Circuit Diagram Interfacing PIR Motion Sensor with Arduino - Circuit...

>