Calling API using ESP8266
Contents
The objective of this tutorial is to explain how to do HTTP JSON GET requests using an ESP8266 and Arduino IDE.
Components Required
- ESP8266
- USB Cable
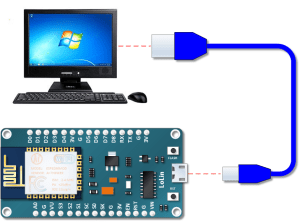
Hardware
Software
Code
#include <ESP8266WiFi.h>
#include <ESP8266HTTPClient.h>
#include <ArduinoJson.h>

const char* ssid = "SERVER NAME";
const char* password = "SERVER PASSWORD";

void setup()
{
  Serial.begin(115200);
  WiFi.begin(ssid, password);

  while (WiFi.status() != WL_CONNECTED)
  {
    delay(1000);
    Serial.println("Connecting...");
  }
}

void loop()
{
  if (WiFi.status() == WL_CONNECTED)
  {
    HTTPClient http; //Object of class HTTPClient
    http.begin("http://jsonplaceholder.typicode.com/users/1");
    int httpCode = http.GET();

    if (httpCode > 0)
    {
      const size_t bufferSize = JSON_OBJECT_SIZE(2) + JSON_OBJECT_SIZE(3) + JSON_OBJECT_SIZE(5) + JSON_OBJECT_SIZE(8) + 370;
      DynamicJsonBuffer jsonBuffer(bufferSize);
      JsonObject& root = jsonBuffer.parseObject(http.getString());

      int id = root["id"];
      const char* name = root["name"];
      const char* username = root["username"];
      const char* email = root["email"];

      Serial.print("Name:");
      Serial.println(name);
      Serial.print("Username:");
      Serial.println(username);
      Serial.print("Email:");
      Serial.println(email);
    }
    http.end(); //Close connection
  }
  delay(60000);
}
Code Explanation
Include the library “ESP8266WiFi.h” which provides ESP8266 specific WiFi routines and we are calling it to connect to the network. Also include the library “ESP8266HTTPClient.h”, which provides methods to send HTTP requests.
#include <ESP8266WiFi.h>
#include <ESP8266HTTPClient.h>
#include <ArduinoJson.h>
Get and enter the “ssid” and “password” i.e., your WiFi name and password.
const char* ssid = "SERVER NAME";
const char* password = "SERVER PASSWORD";
Put your setup or configuration code in the setup function, it will only run once during the startup.
Here in the setup function, it will connect to WiFi Network and also initialize serial communication for debugging and logging with a baud rate of 115200.
void setup()
{
  Serial.begin(115200);
  WiFi.begin(ssid, password);

  while (WiFi.status() != WL_CONNECTED)
  {
    delay(1000);
    Serial.println("Connecting...");
  }
}
Put your main code in void loop() function to run repeatedly. Check WiFi connection status.
void loop()
{
if (WiFi.status() == WL_CONNECTED)
{
First, we declare an object of class HTTPClient, which we will simply call http. This class provides the methods to create and send the HTTP request.
HTTPClient http;
Call the begin method on the http object and pass the URL that we want to connect and make the GET request. The destination website (jsonplaceholder.typicode.com), specified here implements a dummy REST API for testing and prototyping.
Test API
We are calling following test api in the program.
URL : http://jsonplaceholder.typicode.com/users/1
Response :
{
  "id": 1,
  "name": "Leanne Graham",
  "username": "Bret",
  "email": "[email protected]",
  "address": {
    "street": "Kulas Light",
    "suite": "Apt. 556",
    "city": "Gwenborough",
    "zipcode": "92998-3874",
    "geo": {
      "lat": "-37.3159",
      "lng": "81.1496"
    }
  },
  "phone": "1-770-736-8031 x56442",
  "website": "hildegard.org",
  "company": {
    "name": "Romaguera-Crona",
    "catchPhrase": "Multi-layered client-server neural-net",
    "bs": "harness real-time e-markets"
  }
}
http.begin("http://jsonplaceholder.typicode.com/users/1");
Send the request by calling the GET method on the http object. This method will return the status of the operation, which is important to store for error handling.
int httpCode = http.GET();
If the httpCode value is greater than 0, then it should be a standard HTTP code. We can get and print the parameters like name, username and email by calling the getString method on the http object. If it is not greater than 0, there there is some issue regarding connection with the server.
   if (httpCode > 0)
   {
     const size_t bufferSize = JSON_OBJECT_SIZE(2) + JSON_OBJECT_SIZE(3) + JSON_OBJECT_SIZE(5) + JSON_OBJECT_SIZE(8) + 370;
     DynamicJsonBuffer jsonBuffer(bufferSize);
     JsonObject& root = jsonBuffer.parseObject(http.getString());

     int id = root["id"]; // 1
     const char* name = root["name"]; // "Leanne Graham"
     const char* username = root["username"]; // "Bret"
     const char* email = root["email"]; // "[email protected]"

     Serial.print("Name:");
     Serial.println(name);
     Serial.print("Username:");
     Serial.println(username);
     Serial.print("Email:");
     Serial.println(email);
   }
Finally, call the end method. This is very important to close the TCP connection and thus free the resources.
  http.end(); //Close connection
  }
This delay function Sends a request every 30 seconds.
  delay(30000);
}
Note: The microcontroller has a limited amount of resources, it is not able to handle very large results. So, it is not expected that it will be used to make and process requests to sites that return a lot of information, as a typical browser would do.
Libraries:
- WiFi library
- ArduinoJson library: Got to Sketch -> Include Library -> Manage Libraries. Library Manager pop-up window will appear, then type “ArduinoJson” in the text box and click on install icon to install ArduinJson library.
What is ArduinoJson?
JSON (JavaScript Object Notation) is a lightweight text-based language independent open standard design for exchanging data. It is easy for humans to read and write and as well it is easy for machines to parse and generate.
JSON is primarily used for serializing and transmitting structured data over network connection – transmit data between a server and a client. It is often used in services like APIs (Application Programming Interfaces) and web services that provide public data.
Here we are using ArduinoJson library to decode and encode the JSON string. ArduinoJson library which was designed to be the most intuitive JSON library, with the smallest footprint and most efficiently memory management for Arduino.
In JSON, they take on these forms:
An object is an unordered set of name/value pairs. An object begins with { (left brace) and ends with } (right brace). Each name is followed by : (colon) and the name/value pairs are separated by , (comma).