Interfacing LCD with CloudX Board
Contents
To have a good relationship between human world and machine world, display units plays a vital part. Displays allows us to know what’s happening in a device like the voltage, temperature, present status of the device and even device fault detection etc. LCD’s have a very wide application in embedded systems and it is more preferred than seven segment displays. Alphanumeric LCDs are most commonly used in embedded projects since it is commonly available and easy to use.
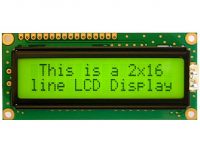
In this tutorial, we will use the most commonly used 16×2 alphanumeric display. It has 16 columns and 2 rows, other sizes are also available like 8×1, 16×1, 16×4, 20×4, 32×2, 40×2, 40×4 etc.
Component Required
- CloudX Microcontroller board (SoftCard and Controller)
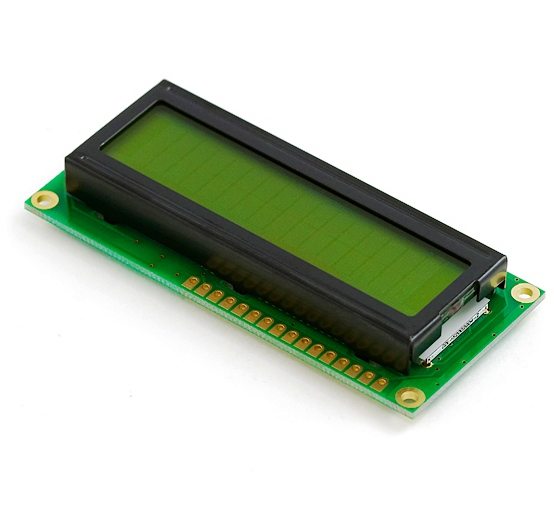
- 16×2 LCD Display
- 1KΩ resistor
- Breadboard
- Male-Male jumper wires
CloudX LCD Library
CloudX LCD library provides all the necessary routines to drive a LCD having HD44780 compliant controllers.
LCD Setting
Prototype : void LCD_setting(char RS, char EN, char D4, char D5, char D6, char D7);
Initializes the LCD based on the provided connections.
LCD Cmd
Prototype : LCD_cmd(unsigned char command);
Sends the specified command to the LCD display. This function requires the LCD to be initialized with LCD_setting function. It accepts below commands.
| Command | Function |
|---|---|
| Clear | Clears the display |
| returnHome | Returns cursor to home position without changing display data RAM |
| moveCursorRight | Move cursor right by one position without changing display data RAM |
| moveCursorLeft | Move cursor left by one position without changing display data RAM |
| shiftDisplayRight | Shifts display right by one position without changing display data RAM |
| shiftDisplayLeft | Shifts display left by one position without changing display data RAM |
| cursorBlink | Turns ON cursor blinking |
| cursorOff | Turns OFF cursor |
| cursorOn | Turns ON cursor |
LCD Write
Prototype : LCD_write(unsigned char row, unsigned char col, unsigned char chr);
Prints a character in the LCD on the specified position.
LCD WriteCP
Prototype : LCD_writeCP(unsigned char chr);
Prints a character in the LCD on the current cursor position.
LCD WriteText
Prototype : LCD_writeText(unsigned char row, unsigned char col, char *s);
Prints a string on the LCD starting from the specified position.
LCD WriteTextCP
Prototype : LCD_writeTextCP(unsigned char *s);
Prints a string on the LCD starting from the current position.
Custom Character
Prototype : void customCharacter(unsigned char row, unsigned char column, unsigned char addressCGRAM);
This function is used to print custom character on the specified position.
Circuit Diagram
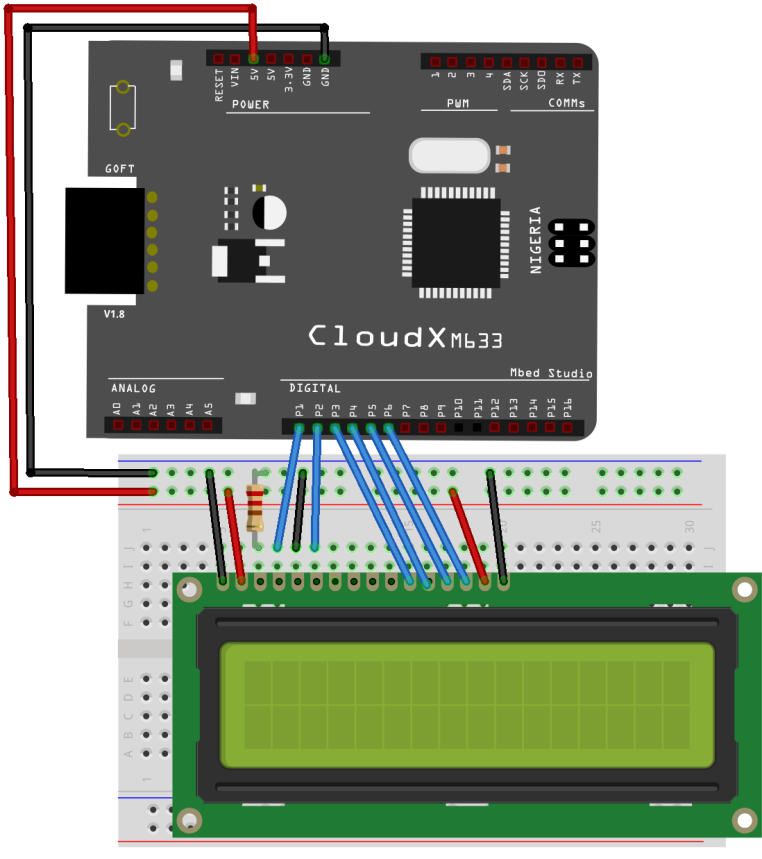
Connections
| CloudX | LCD |
|---|---|
| GND | VSS |
| 5V | VDD |
| GND | VEE (through 1KΩ resistor) |
| P1 | RS |
| GND | RW |
| P2 | E |
| P3 | D4 |
| P4 | D5 |
| P5 | D6 |
| P6 | D7 |
| 5V | LED A |
| GND | LED K |
Program
#include <CloudX\M633.h
#include <CloudX\Lcd.h>
setup(){
//setup here
LCD_setting(1,2,3,4,5,6); //RS, EN, D4, D5, D6, D7
LCD_cmd(clear); //Clear the display
loop(){
//Program here
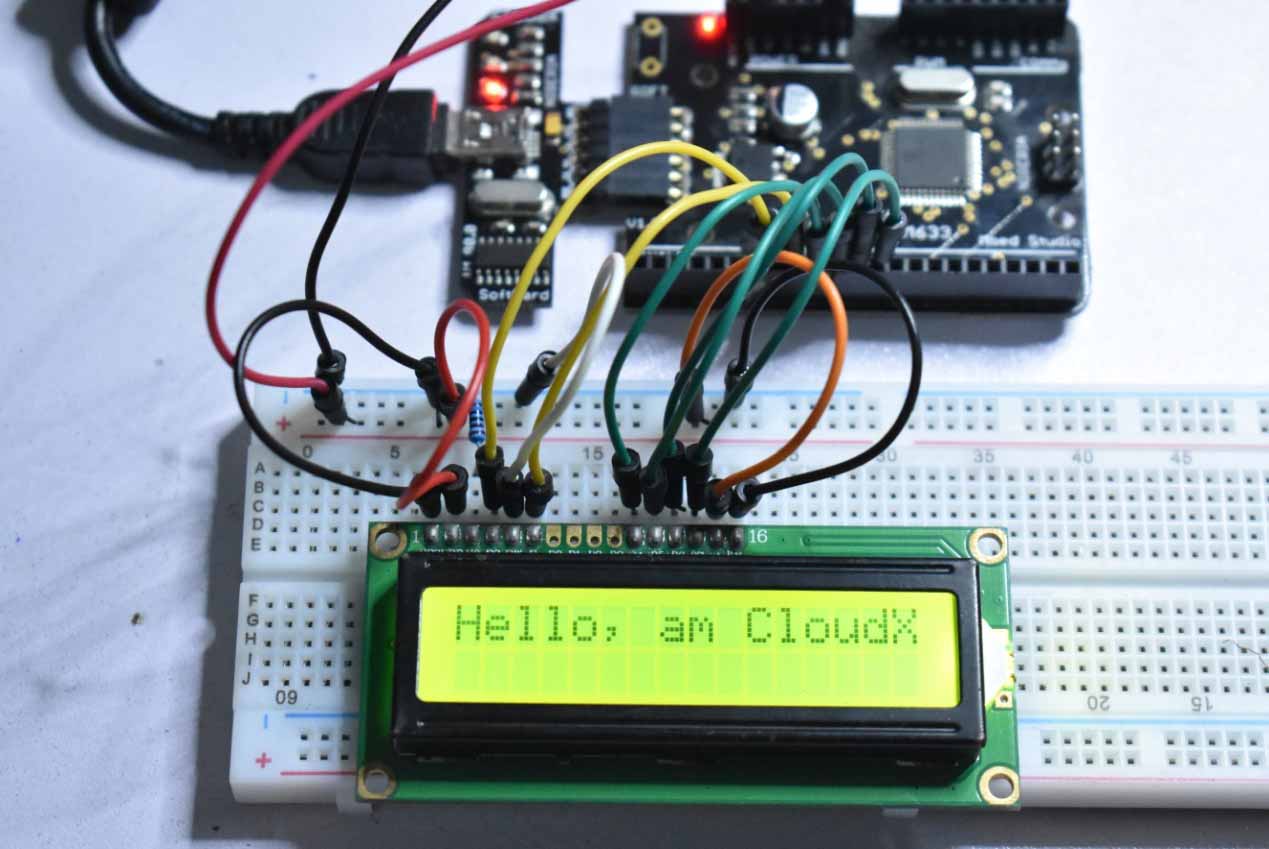
LCD_writeText(1,1,"Hello, am CloudX");
delay(1000);
}
}
Description
The code above shows how to print a message in the LCD. Always ensure that M633.h included first before any other library, then we included the LCD library since that’s what we are working with. Under the setup(), we configured the LCD pins based on our hardware design using LCD_setting(1,2,3,4,5,6). I will advise you to go through the CloudX documentation file to learn more about any library before you are using. Then we cleared the screen using LCD_cmd(clear), it will clear any junk data on the display. Then write text on the screen using LCD_writeText(1,1,”Hello, am CloudX”) .
Experiment