

3D Printing Technology or Stereo Lithography
3D printing technology or Stereo lithography is the process of printing 3dimensional figures by the method of layer deposition. 3D printing is achieved by employing additive processes, where an object is developed by laying down successive layers of material. Three Dimensional Printing requires Rapid Prototyping (RP) for the creation of the functional parts and tooling directly from a CAD model.
Until now, 3D printing has been extensively used for building moulds/ prototypes for industrial applications and numerous other places. With the advent of 2012, 3D printing technology has definitely moved up the ladder.
It takes several steps to come out with an efficient and finished product development as outlined below.
1. CAD Preparation
3D printers need a specific file type ie, .stl to print the model. Since this technology has not yet been developed to reach its full potential, negotiations are necessitated while designing. For instance, the materials used by 3D printers are typically weaker than injection moulded plastics which calls for the reinforcement of what that is being printed.

2. 3D Printing
The printing process is made automatic in most of the 3D printers that are now available in the market. They make layers along the height , each layer of .003″ thickness. This is roughly the thickness of a human hair or sheet of paper. Though the time taken to print a given object depends primarily on the height of the design, most designs take a minimum of several hours. The ZCorp printers are unique in the fact that they can print in full color.

3. Cleaning 3D Printouts
To support the parts which over hang, every 3d printers use some material. Some use plastics that can be broken off while others use wax based materials that are melted off. The ZCorp printers use a loose powder which can be blown off and reused in future models.

This is a partially finished sculpture from which the supporting parts have been removed. ZCorp printers embed the color in the material and it is enhanced through a process of chemical infiltration.
4. Post Processing
Post processing includes the furnishing part. The product has to be painted or furnished. The ZCop printed items are placed in a special glue so that they become strong and shiny.
The difference between pre/post infiltration is striking.
5. Post Processing Continued
This step is specially meant for ZCop printers. The product furnished with the glue is heated to set it. This can be done domestically using kitchen ovens.

7. Final 3D Printout
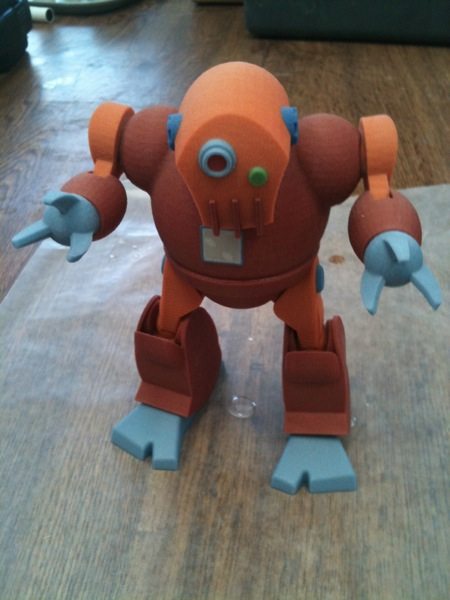
Most of today’s printouts have average quality . They look great from a couple of paces, but a closer look unveils the fact that they have not turned out as expected in many perspectives. As a result, few 3D printer companies provide high resolution photos for the consumers to checkout their products.
8. Packaging
Parts produced in 3D printers, especially the ZCorp are more fragile than products produced via traditional means. Inorder to protect their products from transportation damages, companies take extra care during the packaging and shipping phase.


