

Sending E-mail from ESP8266 – IoT Project
Contents
The scope of the IoT applications is growing from controlling appliances to monitoring devices (like sensors) and sending e-mails. So here I am writing an article on Sending Email from ESP8266 and it will be a step forward in the IoT Implementation.
Components Required
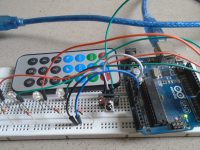
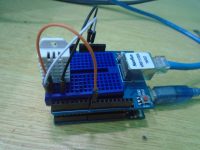
- ESP8266
- Breadboard
- USB Cable
Software
SMTP Server Setup
In order to send e-mail from ESP8266 Module, we need to use the SMTP protocol. Hence, an SMTP Server is required to send the e-mails and the ESP8266 will act as an SMTP Client.
So, I have decided to use a third-party SMTP Server and I found “SMTP2GO” as a reliable choice.

- Firstly click on SMTP2GO and click on Sign Up to create new account.
- After creating an account, we will get verification mail to our mail ID.
- The moment we confirm our e-mail address and login, SMTP Username and SMTP Password information will be displayed on server. Note: SMTP Password is different from the SMTP2GO Login Password.
- Make a note of SMTP Username and SMTP Password
- Now enter the Dashboard, click on “Settings” and next click on “Users”.

In that, we can see the information regarding the SMTP Server and PORT number. It is usually as follows:
- SMTP Server: mail.smtp2go.com
- SMTP PORT: 2525
Encoding Username and Password
We need to encode the SMTP Username and SMTP Password to base64 format with ASCII Character Set.

- Click on link to encode the Username and Password: BASE64ENCODE.
- Enter your SMTP Username and Password separately.
- Choose Destination Character set as “ASCII” and Newline separator as “CRLF (Windows)”.
- Click on “>ENCODE<” icon to get encoded content and note down it.
Programming ESP8266
Arduino Code
#include <ESP8266WiFi.h>

const char* ssid = "SERVER NAME";
const char* password = "SERVER PASSWORD";
char server[] = "mail.smtp2go.com";

WiFiClient espClient;

void setup()
{
  Serial.begin(115200);
  delay(10);
  Serial.println("");
  Serial.println("");
  Serial.print("Connecting To: ");
  Serial.println(ssid);
  WiFi.begin(ssid, password);

  while (WiFi.status() != WL_CONNECTED)
  {
    delay(500);
    Serial.print(".");
  }
  Serial.println("");
  Serial.println("WiFi Connected.");
  Serial.print("IP address: ");
  Serial.println(WiFi.localIP());
  byte ret = sendEmail();
}

void loop()
{
}

byte sendEmail()
{
  if (espClient.connect(server, 2525) == 1)
  {
    Serial.println(F("connected"));
  }
  else
  {
    Serial.println(F("connection failed"));
    return 0;
  }
  if (!emailResp())
  return 0;

  Serial.println(F("Sending EHLO"));
  espClient.println("EHLO www.example.com");
  if (!emailResp())
  return 0;

  espClient.println("STARTTLS");
  if (!emailResp())
  return 0;*/

  Serial.println(F("Sending auth login"));
  espClient.println("AUTH LOGIN");
  if (!emailResp())
  return 0;

  Serial.println(F("Sending User"));

  espClient.println("Enter base64, ASCII ENCODED USERNAME");
  if (!emailResp())
  return 0;

  Serial.println(F("Sending Password"));

  espClient.println("Enter base64, ASCII ENCODED PASSWORD");
  if (!emailResp())
  return 0;

  Serial.println(F("Sending From"));

  espClient.println(F("MAIL From: [email protected]"));
  if (!emailResp())
  return 0;

  Serial.println(F("Sending To"));
  espClient.println(F("RCPT To: [email protected]"));
  if (!emailResp())
  return 0;

  Serial.println(F("Sending DATA"));
  espClient.println(F("DATA"));
  if (!emailResp())
  return 0;
  Serial.println(F("Sending email"));

  espClient.println(F("To: [email protected]"));

  espClient.println(F("From: [email protected]"));
  espClient.println(F("Subject: ESP8266 test e-mail\r\n"));
  espClient.println(F("This is is a test e-mail sent from ESP8266.\n"));
  espClient.println(F("Second line of the test e-mail."));
  espClient.println(F("Third line of the test e-mail."));

  espClient.println(F("."));
  if (!emailResp())
  return 0;

  Serial.println(F("Sending QUIT"));
  espClient.println(F("QUIT"));
  if (!emailResp())
  return 0;

  espClient.stop();
  Serial.println(F("disconnected"));
  return 1;
}

byte emailResp()
{
  byte responseCode;
  byte readByte;
  int loopCount = 0;

  while (!espClient.available())
  {
    delay(1);
    loopCount++;
    if (loopCount > 20000)
    {
      espClient.stop();
      Serial.println(F("\r\nTimeout"));
      return 0;
    }
  }
  responseCode = espClient.peek();
  while (espClient.available())
  {
    readByte = espClient.read();
    Serial.write(readByte);
  }

  if (responseCode >= '4')
  {
    return 0;
  }
  return 1;
}
Code Explanation
We are including ESP8266 WiFi library which provides ESP8266 specific WiFi routines and we are calling it to connect to the network.
#include <ESP8266WiFi.h>
Get and enter the “ssid” and “password” i.e., your WiFi name and password.
const char* ssid = "SERVER NAME";
const char* password = "SERVER PASSWORD";
Enter the SMTP server.
char server[] = "mail.smtp2go.com";
Creates a client that can connect to a specified internet IP address.
WiFiClient espClient;
Put your setup or configuration code in the setup function, it will only run once during the startup. Here in the setup function, it will initialize serial communication for debugging and logging with a baud rate of 115200.
void setup()
{
  Serial.begin(115200);
  delay(10);
  Serial.println("");
  Serial.println("");
Actual connection to WiFi is initialized by calling below instructions.
  Serial.print("Connecting To: ");
  Serial.println(ssid);
  WiFi.begin(ssid, password);
Connection process can take couple of seconds. While() loop checks the module connection with the WiFi network. If it is connected to WiFi then it will display WiFi connected message on the serial monitor, otherwise it will continue to display “dots (……)”.
  while (WiFi.status() != WL_CONNECTED)
  {
    delay(500);
    Serial.print(".");
  }
  Serial.println("");
  Serial.println("WiFi Connected.");
  Serial.print("IP address: ");
  Serial.println(WiFi.localIP());
  byte ret = sendEmail();
}
Put your main code in void loop() function to run repeatedly.
void loop()
{
}
This loop connects SMTP server to port 2525 and sends the email to concern person. Sender and receiver e-mail id has mentioned in the below code.
byte sendEmail()
{
  if (espClient.connect(server, 2525) == 1)
  {
    Serial.println(F("connected"));
  }
  else
  {
    Serial.println(F("connection failed"));
    return 0;
  }
  if (!emailResp())
  return 0;
  Serial.println(F("Sending EHLO"));
  espClient.println("EHLO www.example.com");
  if (!emailResp())
  return 0;

  espClient.println("STARTTLS");
  if (!emailResp())
  return 0;*/

  Serial.println(F("Sending auth login"));
  espClient.println("AUTH LOGIN");
  if (!emailResp())
  return 0;
Enter the ASCII encoded base64 username
  Serial.println(F("Sending User"));
  espClient.println("Enter base64, ASCII ENCODED USERNAME"); //base64, ASCII encoded Username
  if (!emailResp())
  return 0;
Enter the ASCII encoded base64Password
  Serial.println(F("Sending Password"));
  espClient.println("Enter base64, ASCII ENCODED PASSWORD");
  if (!emailResp())
  return 0;
Enter sender email address
  Serial.println(F("Sending From"));
  espClient.println(F("MAIL From: [email protected]"));
  if (!emailResp())
  return 0;
Enter recipient email address
  Serial.println(F("Sending To"));
  espClient.println(F("RCPT To: [email protected]"));
  if (!emailResp())
  return 0;
Actual data sending takes place in the below steps.
  Serial.println(F("Sending DATA"));
  espClient.println(F("DATA"));
  if (!emailResp())
  return 0;
Enter recipient address in “To:” section, sender email address in “From:” section and in next stage enter the message which we want send via email.
  Serial.println(F("Sending email"));

  espClient.println(F("To: [email protected]"));
  espClient.println(F("From: [email protected]"));
  espClient.println(F("Subject: ESP8266 test e-mail\r\n"));
  espClient.println(F("Sending Email from ESP8266.\n"));
  espClient.println(F("Happy New Year."));

  espClient.println(F("."));
  if (!emailResp())
  return 0;

  Serial.println(F("Sending QUIT"));
  espClient.println(F("QUIT"));
  if (!emailResp())
  return 0;

  espClient.stop();
  Serial.println(F("disconnected"));
  return 1;
}

byte emailResp()
{
  byte responseCode;
  byte readByte;
  int loopCount = 0;
This loop continuously monitors the espClient availability. If available it will wait for 20 seconds and if nothing is received it will stop the connection.
  while (!espClient.available())
  {
    delay(1);
    loopCount++;
    if (loopCount > 20000)
    {
      espClient.stop();
      Serial.println(F("\r\nTimeout"));
      return 0;
    }
  }
  responseCode = espClient.peek();
  while (espClient.available())
  {
    readByte = espClient.read();
    Serial.write(readByte);
  }

  if (responseCode >= '4')
  {
    return 0;
  }
  return 1;
}
Working
In the above code we have mentioned Sender e-mail Id and receiver e-mail id. The e-mail will be send from sender to receiver after uploading the code to ESP8266, .
Practical Implementation


I’m facing Same problem
……….
WiFi Connected.
IP address: 192.168.0.6
connected
220 mail.smtp2go.com ESMTP Exim 4.92-S2G Sun, 12 Apr 2020 19:32:08 +0000
Sending EHLO
250-mail.smtp2go.com Hello http://www.example.com [103.212.212.7]
250-SIZE 52428800
250-8BITMIME
250-DSN
250-PIPELINING
250-AUTH CRAM-MD5 PLAIN LOGIN
250-CHUNKING
250-STARTTLS
250-PRDR
250 HELP
220 TLS go ahead
Sending auth login
Sending User
Timeout
(above mentioned details are from serial monitor)
I am facing problem here please help me how to overcome it.
E mail based IoT human sensor security