Getting Started with Arduino – LED Blinking
Contents
Arduino Uno is the best development board for beginners in the field of embedded systems. We can program Arduino board with less technical knowledge and programming skills. This tutorial is intended to beginners in the field of Arduino. Hope you already have an Arduino board. Then you have to download Arduino Software and Driver. You can download it from Arduino Website.
Installing Arduino Driver
Now connect the Arduino to your computer using a USB cable. As usual Windows may start driver installing procedure but it will fail after some time. We need to install driver manually which comes along with Arduino Software.
Right Click on My Computer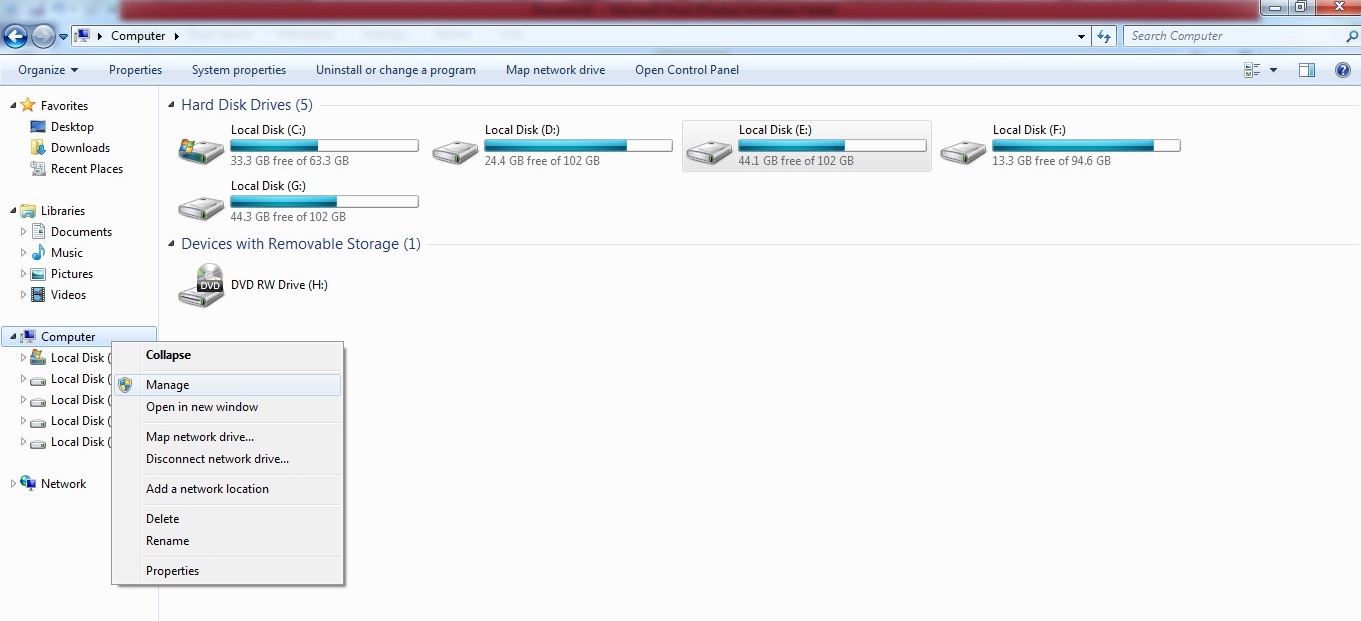 |
Select Manage >> Device Manager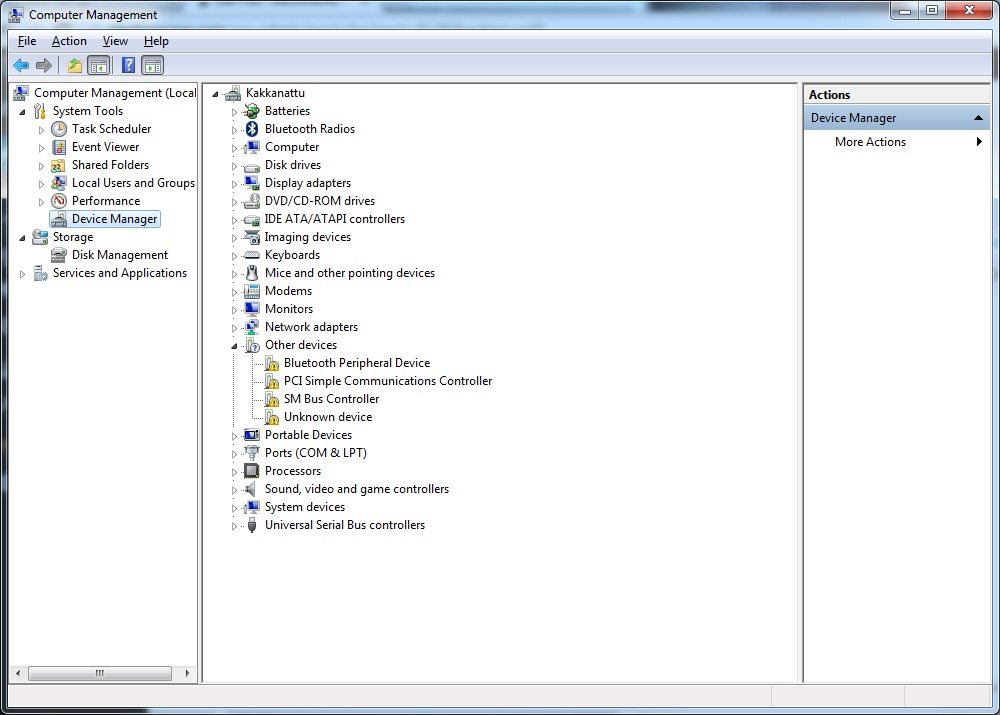 |
You can find Arduino under the Ports (COM & LPT). If it is not listed there, look under Other Devices >> Unknown Device.
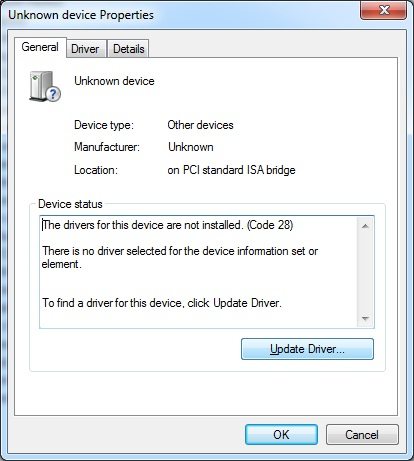
| Double Click on the Unknown Device, you can see details.
|
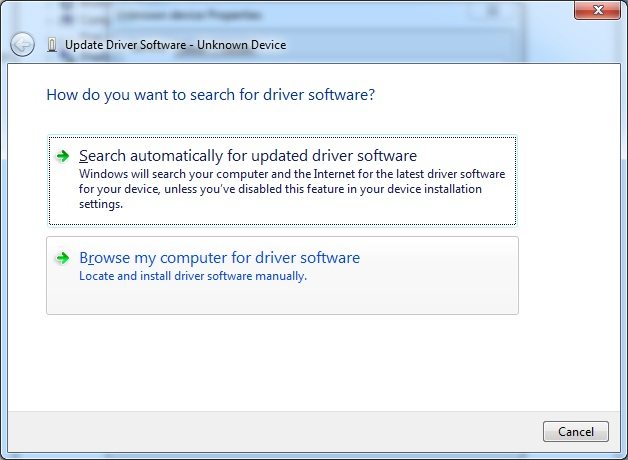
Select Update Driver
|
Select “Browse My Computer for driver software”
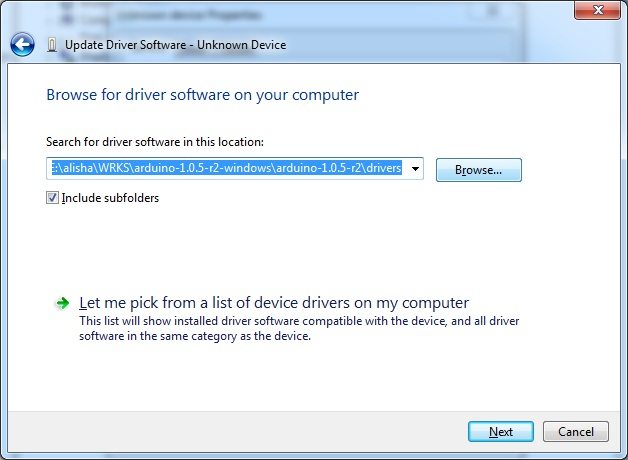 Extract the downloaded zip file. Select the folder “drivers” in the extracted folder. |
Click Next
|
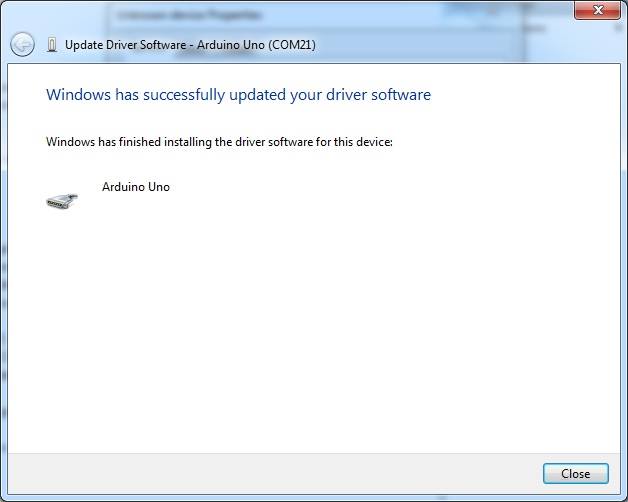
Hope you successfully installed driver.
Now we can start Arduino programming. All of us start learn a new programming from Hello World. In microcontroller fields the Hello World example is usually blinking an led. In Arduino Uno, there are 4 on-board LEDs. One for indicating power, two (RX and TX) for indicating serial communication between Computer and Arduino. The remaining one is connected to PIN : 13. Thus when the digital pin 13 is HIGH, LED turns ON and when it is LOW, LED will be OFF.
Firstly we can start by blinking this on board LED. Arduino IDE comes with a lot of examples, which makes our task simpler.
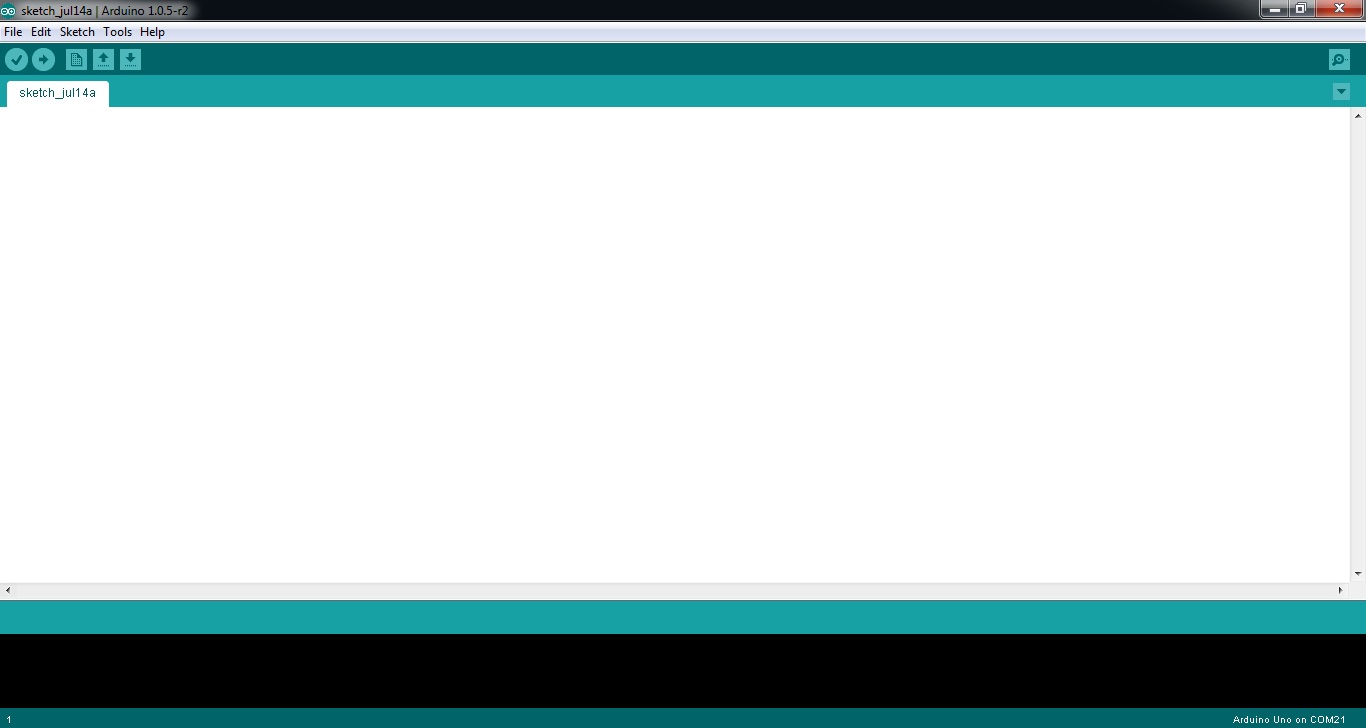
- Open the Arduino IDE
- Open File >> Examples >> 01. Basics >> Blink
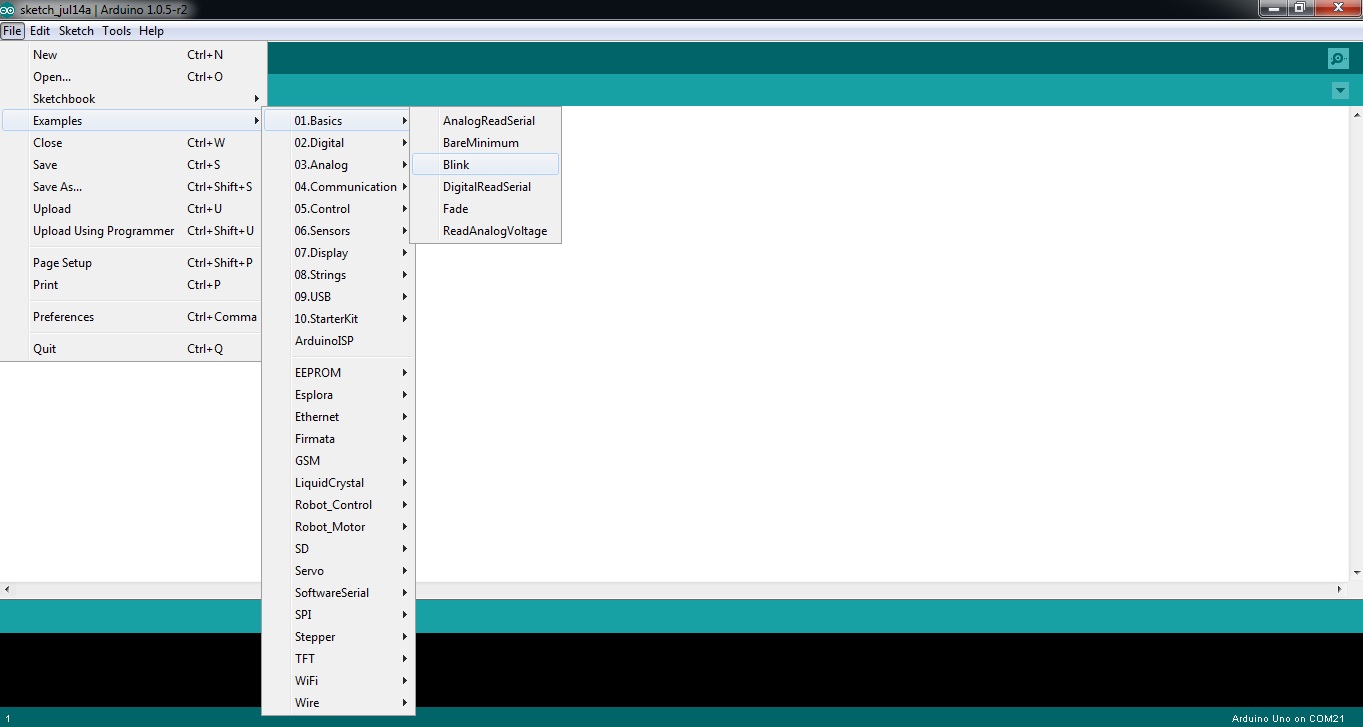
- It will open the sketch (code) for blinking on board LED connected to PIN : 13
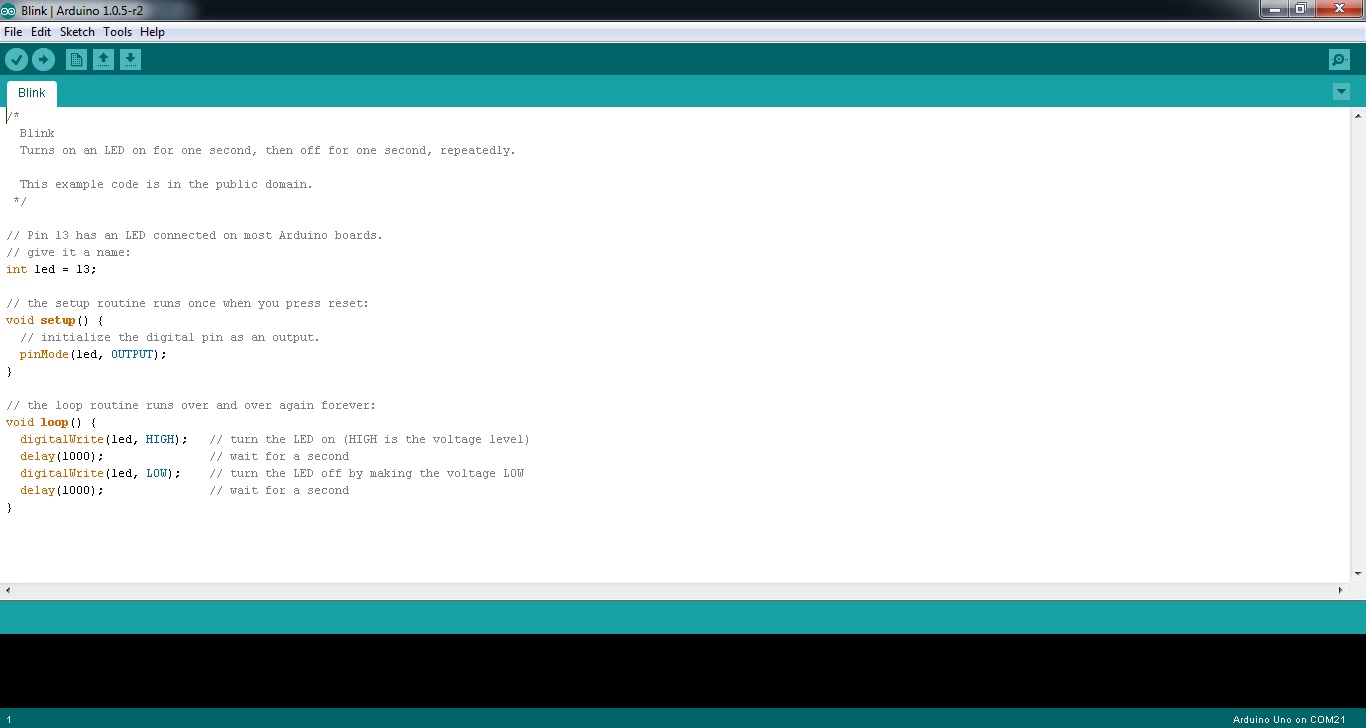
On-Board LED Blinking – Arduino Sketch
/*
Blink
Turns on an LED on for one second, then off for one second, repeatedly.

This example code is in the public domain.
*/

// Pin 13 has an LED connected on most Arduino boards.
// give it a name:
int led = 13;

// the setup routine runs once when you press reset:
void setup() {
    // initialize the digital pin as an output.
    pinMode(led, OUTPUT);
}

// the loop routine runs over and over again forever:
void loop() {
    digitalWrite(led, HIGH); // turn the LED on (HIGH is the voltage level)
    delay(1000); // wait for a second
    digitalWrite(led, LOW); // turn the LED off by making the voltage LOW
    delay(1000); // wait for a second
}
- Now make sure that your board is selected correctly, Tools >> Board >> Arduino Uno
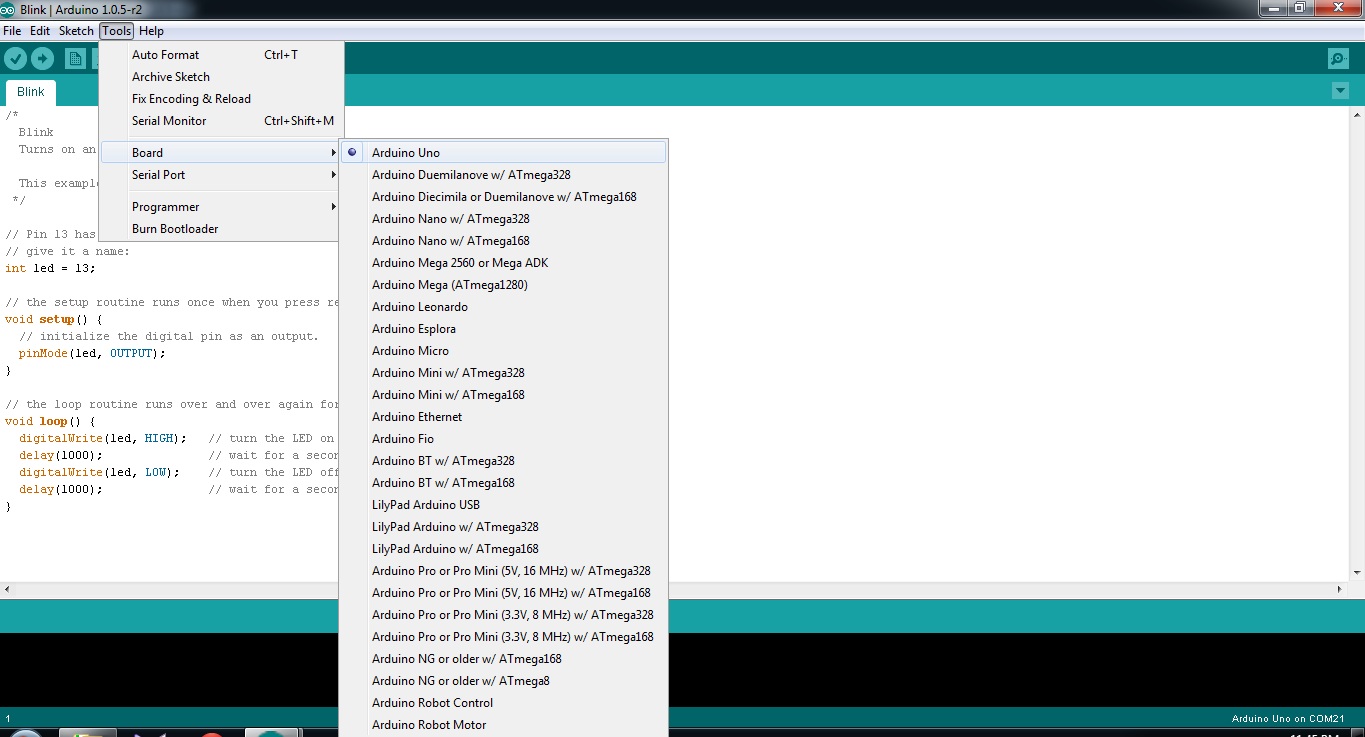
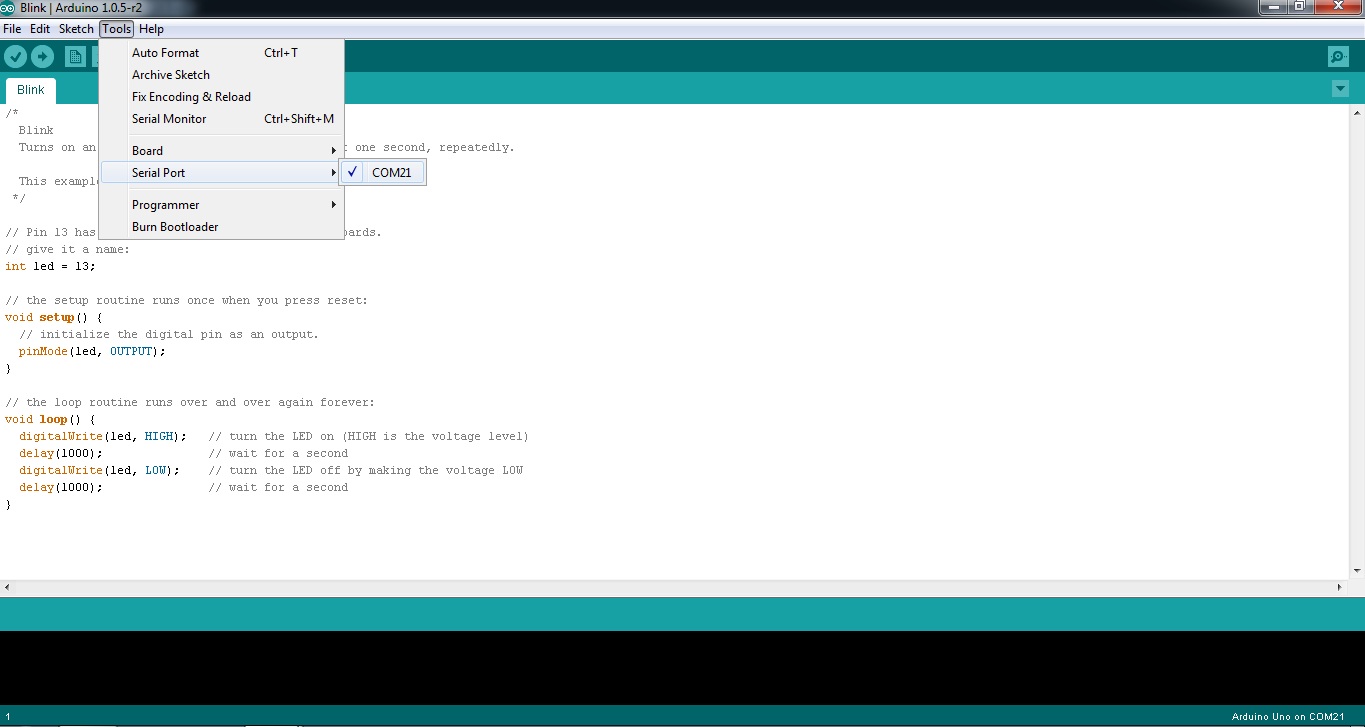
- Select the COM PORT to which the Arduino is connected to your computer using the menu Tools >> Serial Port.
- To find COM PORT, Right Click on My Computer >> Manage >> Device Manager >> Ports (COM & LPT)
|
|
|

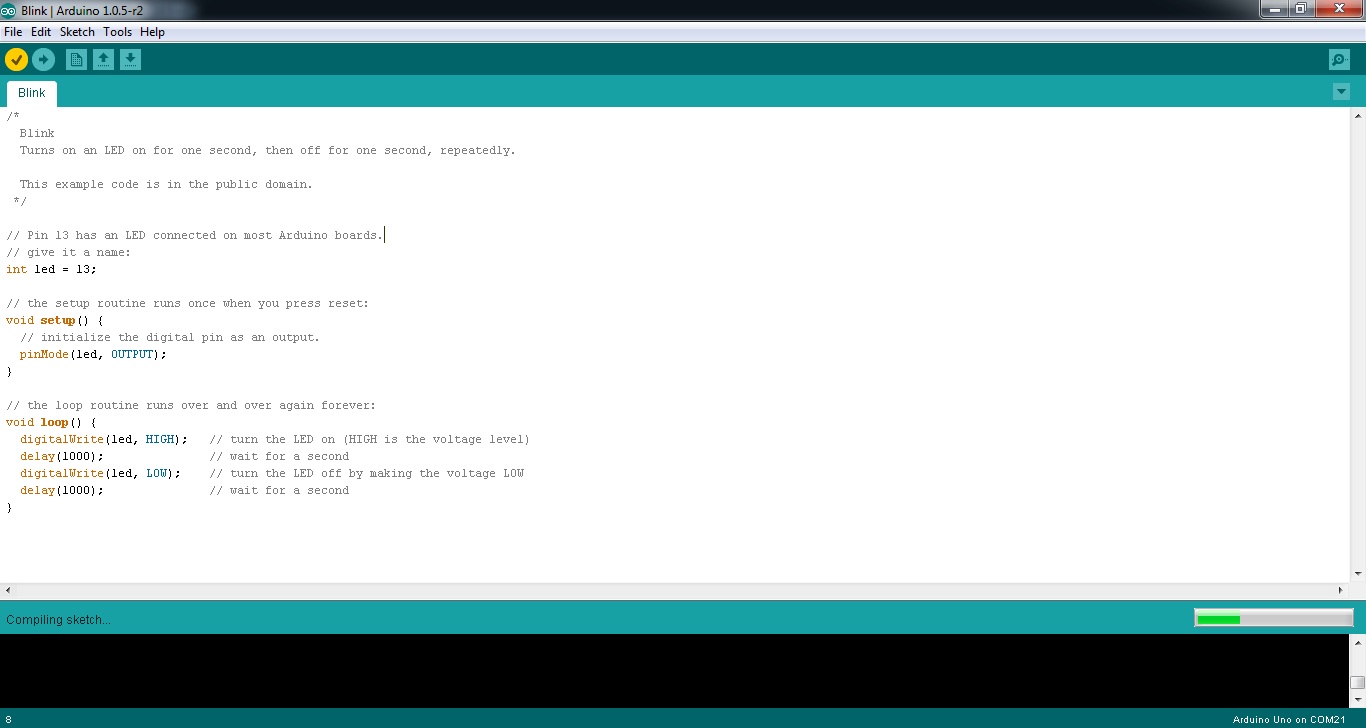
- Now you can compile the sketch by clicking on the Verify Button
![]()
| Compiling Process will be started when you click Verify Button
|
If the compilation process is completed successfully, “Done Compiling will be displayed on the bottom left of your IDE.

|
Now we can upload the sketch to Arduino Board by simply clicking on the Upload Button.
![]()
You can see that the RX and TX LEDs on your board is blinking indicating data transfer. A message “Done Uploading” will be displayed at the bottom of the IDE on completion. Automatic reset of the Arduino board will happen after uploading the program.

After uploading you can see blinking on-board LED.
Blinking An External LED
Now we can try blinking an external LED connected to a digital pin (say 8) of Arduino.
Circuit Diagram
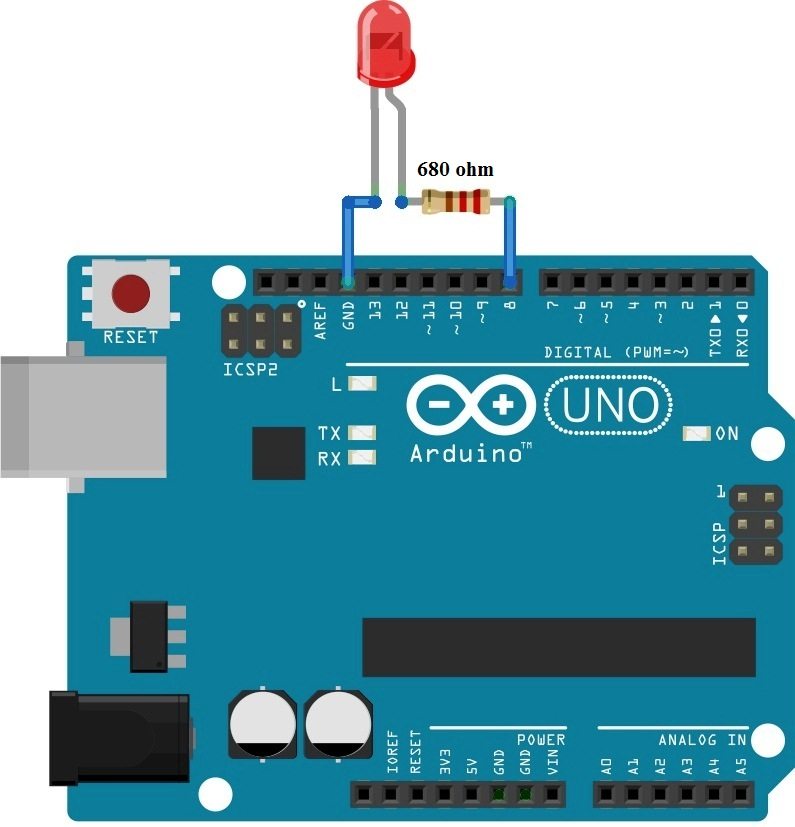
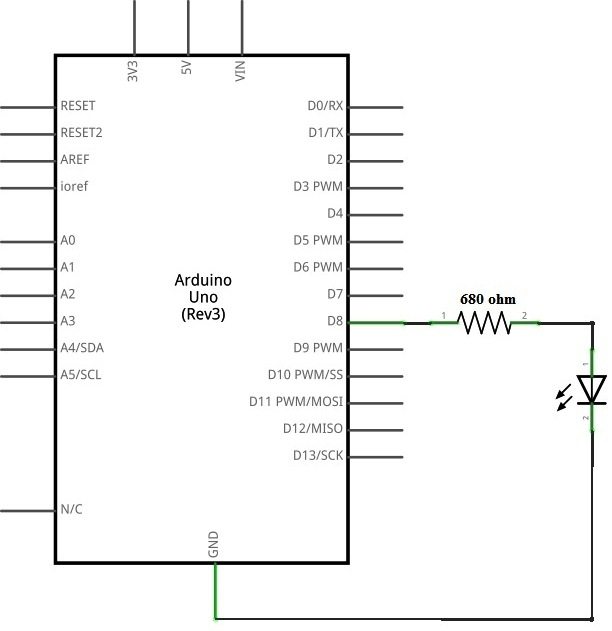
LED is connected to 8th digital pin of Arduino. A 680Ω resistor is connected in series to limit the current through the LED.
Sketch
Just change the pin number in the above program to 8.
int led = 8;
void setup() {
    pinMode(led, OUTPUT);
}

void loop() {
    digitalWrite(led, HIGH);
    delay(1000);
    digitalWrite(led, LOW);
    delay(1000);
}
Now Just Verify and Upload the program, you can see the blinking LED.