

Interfacing GSM Module with Arduino
Contents
In this article, I am going to explain about interfacing of GSM Module with Arduino. Interfacing a GSM module to Arduino is pretty simple. We have to make only 3 connections between the GSM module and Arduino. For the working demonstration we will be sending an SMS to a particular number whenever a switch is pressed.
Components Required
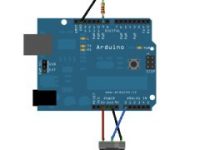
- Arduino Uno
- GSM Modem
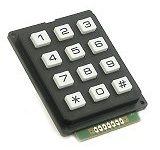
- Switch
- 1kΩ Resistor
- Breadboard
- Connecting Wires
Hardware
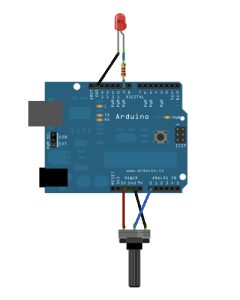
Circuit Diagram

Connections
- Connect TX pin of GSM Module to RX pin of Arduino Uno.
- Connect RX pin of GSM Module to TX pin of Arduino Uno.
- Connect GND pin of GSM Module to GND pin of Arduino Uno.
Steps to boot GSM module
- Power ON the GSM module by providing 5V and GND.
- Insert the SIM card to GSM module and lock it.
- Initially blinking rate of network LED will be high. After sometime observe the blinking rate of ‘network LED’ (GSM module will take some time to establish connection with mobile network)
- Once the connection is established successfully, the network LED will blink continuously for every 3 seconds.
- Even we can check the connection establishment of GSM module with mobile by making a call to the number of the SIM. If we hear a ring back, the GSM module has successfully established network connection.
Software
Code
const int Input1=8;
int State1=0;

void setup(){
  Serial.begin(9600);
  pinMode(Input1, INPUT);
}

void loop()
{
  State1= digitalRead(Input1);

  if(State1 == HIGH)
    {
      sendsms();
      delay(2000);
    }
}

void sendsms()
{
  Serial.println("AT\r");
  delay(1000);
  Serial.println("AT+CMGF=1\r");
  delay(1000);
  Serial.println("AT+CMGS=\"XXXXXXXXXX\"\r");
  delay(1000);
  Serial.println("MESSAGE 1");
  delay(1000);
  Serial.println((char)26);
  delay(100);
}
Code Explanation
Input1 is a constant integer type, constants won’t change and it is set to pin number 8 of Arduino. State1 is a variable, variables will change and it is assigned with 0 value.
const int Input1=8;
int State1=0;
Put your setup or configuration code in the setup function, it will only run once during the startup. Initialize the Input1 pin as an input. Set the Baudrate of Serial communication as 9600.
void setup(){
  Serial.begin(9600);
  pinMode(Input1, INPUT);
}
Put your main code in void loop() function to run repeatedly. Read the state of the State1 variable value and check if the switch is pressed which is connected pin number 8 of arduino. If it is, then it will call GSM function to send SMS to the programmed mobile number.
void loop(){
  State1= digitalRead(Input1);

  if(State1 == HIGH)
  {
    sendsms();
    delay(2000);
  }
}
This function is to used establish communication between arduino and GSM module by AT commands to send SMS to the provided mobile number.
void sendsms()
{
  Serial.println("AT\r");        //AT is the abbreviation of Attention. Checking communication.
  delay(1000);
  Serial.println("AT+CMGF=1\r"); // To set the modem in SMS sending mode.
  delay(1000);
  Serial.println("AT+CMGS=\"XXXXXXXXXX\"\r"); // For sending SMS to a number.
  delay(1000);
  Serial.println("MESSAGE 1"); // Message to send
  delay(1000);
  Serial.println((char)26);    // End command for SMS a^Z, ASCII code 26.
  delay(100);
}
Practical Implementation

Working
The switch will be connected digital pin 8 of arduino as an input. Whenever we press the switch, the arduino will communicate with GSM module by using AT commands and sends “MESSAGE” to the programmed mobile number. AT+CMGS at command is used to send SMS.


Thanks very much please I wish to find out how to send sensor data from Arduino to GSM through hardware Serial
I am using sim800A module i want to interface it with Arduino UNo
I am powering it with 12v 2000A ac-dc adapter
Connection are rx of gsm-tx of Arduino
Tx of gsm – rx of Arduino
Gnd -gnd