

IoT Temperature Data Logger Using ESP8266 and LM35
Contents
In this project, we are going to log and monitor temperature data over internet using ThingSpeak IoT server. And we can view the logged data and graph over time in their website. It is made using ESP8266 WiFi module and LM35 temperature sensor. ESP8266 WiFi chip reads the current temperature from LM35 using ADC and sends it to ThingSpeak server for live monitoring from anywhere in the world.
Components Required
- ESP8266
- LM35
- Breadboard
- Connecting Wires
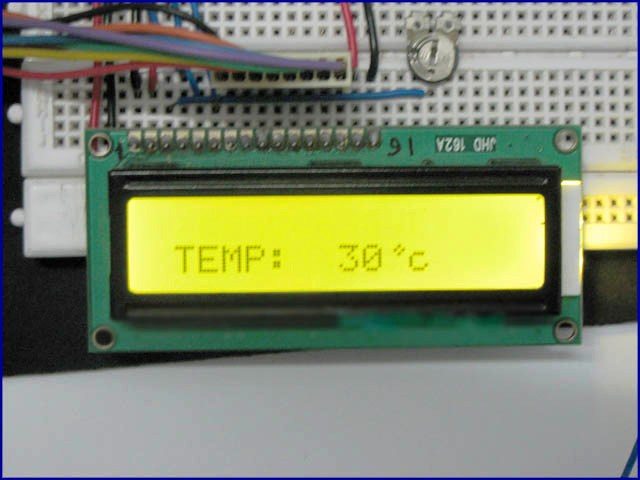
Hardware
Circuit Diagram

Connections
- Connect 3.3V pin of ESP8266 to first pin of LM35
- Connect A0 pin of ESP8266 to second pin of LM35
- Connect GND pin of ESP8266 to third pin of LM35
Software
ThingSpeak API
ThingSpeak is a very good platform for IoT based projects. By using channels and web pages provided by ThingSpeak we can monitor any data over the Internet from anywhere and we can also control our system over the internet. ThingSpeak ‘Collects’ data from sensors, ‘Analyze and Visualize’ data and ‘Acts’ by triggering a reaction. Here we are explaining about how to setup ThingSpeak account for this project.
- First of all, user needs to create an account on ThingSpeak.com, then Sign In and click on ‘Get Started’.
- Now go to the ‘Channels’ menu and click on the ‘New Channel’ option in the same page.
- Now you will see a form for creating the channel, fill the Name and Description as per your choice. Then fill ‘Temperature’ in ‘Field 1’ field. Tick the check box ‘Make Public’ option below the form and finally Save the channel. Now your new channel is ready.
- Now click on ‘API keys’ tab and note the Write and Read API key, here we are only using Write key. You need to copy and paste this key in the code (see below).
- Now user need to upload the program to ESP8266 using Arduino IDE.
- After uploading, open “PRIVATE VIEW” icon in ThingSpeak website and observe the monitored temperature value on graph as shown below.

Keywords
Here are some keywords that are used in the API. Understanding of these terms will make the API documentation easier to understand.
- Channel – Channel can be said as a stream of data. It identified by a numerical channel ID using which data can be inserted or retrieved using ThingSpeak APIs.
- Field – Each channel is having 8 fields which can hold any type of data. For eg. you may store temperature, humidity, RFID data (alphanumeric) in each channels.
- Status – It is short status message to augment the data stored in a channel
- Location – In addition to above 8 fields we can store gps location or coordinates. For eg. we can store the location of the place from where the data is coming. It is having latitude, longitude and elevation.
- Write API Key – A 16 digit api key code that allows an application to write data to a channel. You should not share this API key publicly, because anyone having this key can write data to your channel.
- Read API Key – A 16 digit api key code that allows an application to read the data stored in a channel. You should not share this API key publicly, because anyone having this key can read data from your channel.
Note : For more information you may refer : Creating Account in ThingSpeak.
Code
#include <ESP8266WiFi.h>

String apiWritekey = "XX_YOUR_API_KEY_XX";
const char* ssid = "YOUR WIFI NAME (SSID)";
const char* password = "YOUR WIFI PASSWORD" ;

const char* server = "api.thingspeak.com";
float resolution=3.3/1023;
WiFiClient client;

void setup() {
  Serial.begin(115200);
  WiFi.disconnect();
  delay(10);
  WiFi.begin(ssid, password);

  Serial.println();
  Serial.println();
  Serial.print("Connecting to ");
  Serial.println(ssid);

  WiFi.begin(ssid, password);

  while (WiFi.status() != WL_CONNECTED) {
    delay(500);
    Serial.print(".");
  }
  Serial.println("");
  Serial.print("NodeMcu connected to wifi...");
  Serial.println(ssid);
  Serial.println();
}

void loop() {
  float temp = ((analogRead(A0) * resolution) * 100)+23.89;

  if (client.connect(server,80)) {
    String tsData = apiWritekey;
    tsData +="&field1=";
    tsData += String(temp);
    tsData += "\r\n\r\n";

    client.print("POST /update HTTP/1.1\n");
    client.print("Host: api.thingspeak.com\n");
    client.print("Connection: close\n");
    client.print("X-THINGSPEAKAPIKEY: "+apiWritekey+"\n");
    client.print("Content-Type: application/x-www-form-urlencoded\n");
    client.print("Content-Length: ");
    client.print(tsData.length());
    client.print("\n\n");
    client.print(tsData);

    Serial.print("Temperature: ");
    Serial.print(temp);
    Serial.println("uploaded to Thingspeak server....");
  }
  client.stop();

  Serial.println("Waiting to upload next reading...");
  Serial.println();
  delay(15000);
}
Code Explanation
We are including ESP8266 WiFi library which provides ESP8266 specific WiFi routines and we are calling it to connect to the network.
#include <ESP8266WiFi.h>
As explained above you have to copy and paste your ThinkSpeak write api key here.
String apiWritekey = "XX_YOUR_API_KEY_XX";
Get and enter the “ssid” and “password” i.e., your WiFi name and password. Initialize the device with api domain ‘api.thingspeak.com’ and resolution variable.
const char* ssid = "YOUR WIFI NAME (SSID)";
const char* password = "SERVER PASSWORD";

const char* server = "api.thingspeak.com";
float resolution=3.3/1023;
WiFiClient client;
Put your setup or configuration code in the setup function, it will only run once during the startup.
void setup()
{
  Serial.begin(115200);
  WiFi.disconnect();
  delay(10);
  WiFi.begin(ssid, password);
Actual connection to WiFi is initialized by calling below instructions.
 Serial.println();
 Serial.println();
 Serial.print("Connecting to ");
 Serial.println(ssid);

 WiFi.begin(ssid, password);
Connection process can take couple of seconds. While() loop checks the module connection with the WiFi network. If it is connected to WiFi then it will display WiFi connected message on the serial monitor and web server starts, otherwise it will continue to display “dots (……)”.
  while (WiFi.status() != WL_CONNECTED)
  {
    delay(500);
    Serial.print(".");
  }
  Serial.println("");
  Serial.print("ESP8266 connected to wifi...");
  Serial.println(ssid);
  Serial.println();
}
Put your main code in void loop() function to run repeatedly. LM35 Sensor is connected to analog pin A0 of the ESP8266. Temperature value will be calculated from ADC value according to the following formula.
void loop()
{
  float temp = ((analogRead(A0) * resolution) * 100);
This loop connects to ThingSpeak server and ESP8266 sends the current temperature value to ThingSpeak server.
  if (client.connect(server,80))
  {
    String tsData = apiWritekey;
    tsData +="&field1=";
    tsData += String(temp);
    tsData += "\r\n\r\n";

    client.print("POST /update HTTP/1.1\n");
    client.print("Host: api.thingspeak.com\n");
    client.print("Connection: close\n");
    client.print("X-THINGSPEAKAPIKEY: "+apiWritekey+"\n");
    client.print("Content-Type: application/x-www-form-urlencoded\n");
    client.print("Content-Length: ");
    client.print(tsData.length());
    client.print("\n\n");
    client.print(tsData);

    Serial.print("Temperature: ");
    Serial.print(temp);
    Serial.println("uploaded to Thingspeak server....");
  }
  client.stop(); // stops client communication.

  Serial.println("Waiting to upload next reading..."); // Waits for next reading after displaying current reading.
  Serial.println();
  delay(15000);
}
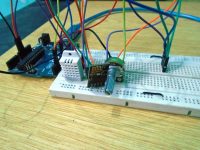
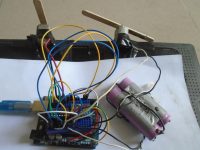
Practical Implementation of Circuit

Working
This project monitors the current room temperature by using LM35 temperature sensor and updates it to ThingSpeak IoT server by using ESP8266 WiFi SoC. Output of temperature sensor i.e., LM35 is connected to analog input pin A0 of ESP8266.
After uploading the code to ESP8266 module, open the serial monitor and press RST pin of ESP8266. The module will connect to ThingSpeak server through internet. Now open ThingSpeak server and observe the monitored temperature value on created channel graph.
Note : Your WiFi network should have internet connection for this to work.


[email protected]
please send me the library of esp8266WiFi.h