

Temperature and Humidity Data Logger using Arduino
Contents
In this project, we are going to make a temperature and relative humidity data logger. Arduino is the brain of this project. DHT22 sensor is used for sensing temperature and relative humidity. Arduino Uno is programmed to read temperature, humidity values from DHT22 sensor and save it to a file in an SD Card. So whenever required we can take the SD Card for viewing data. Here we will take data from SD card and import it to excel to plot graphs.
Components Required
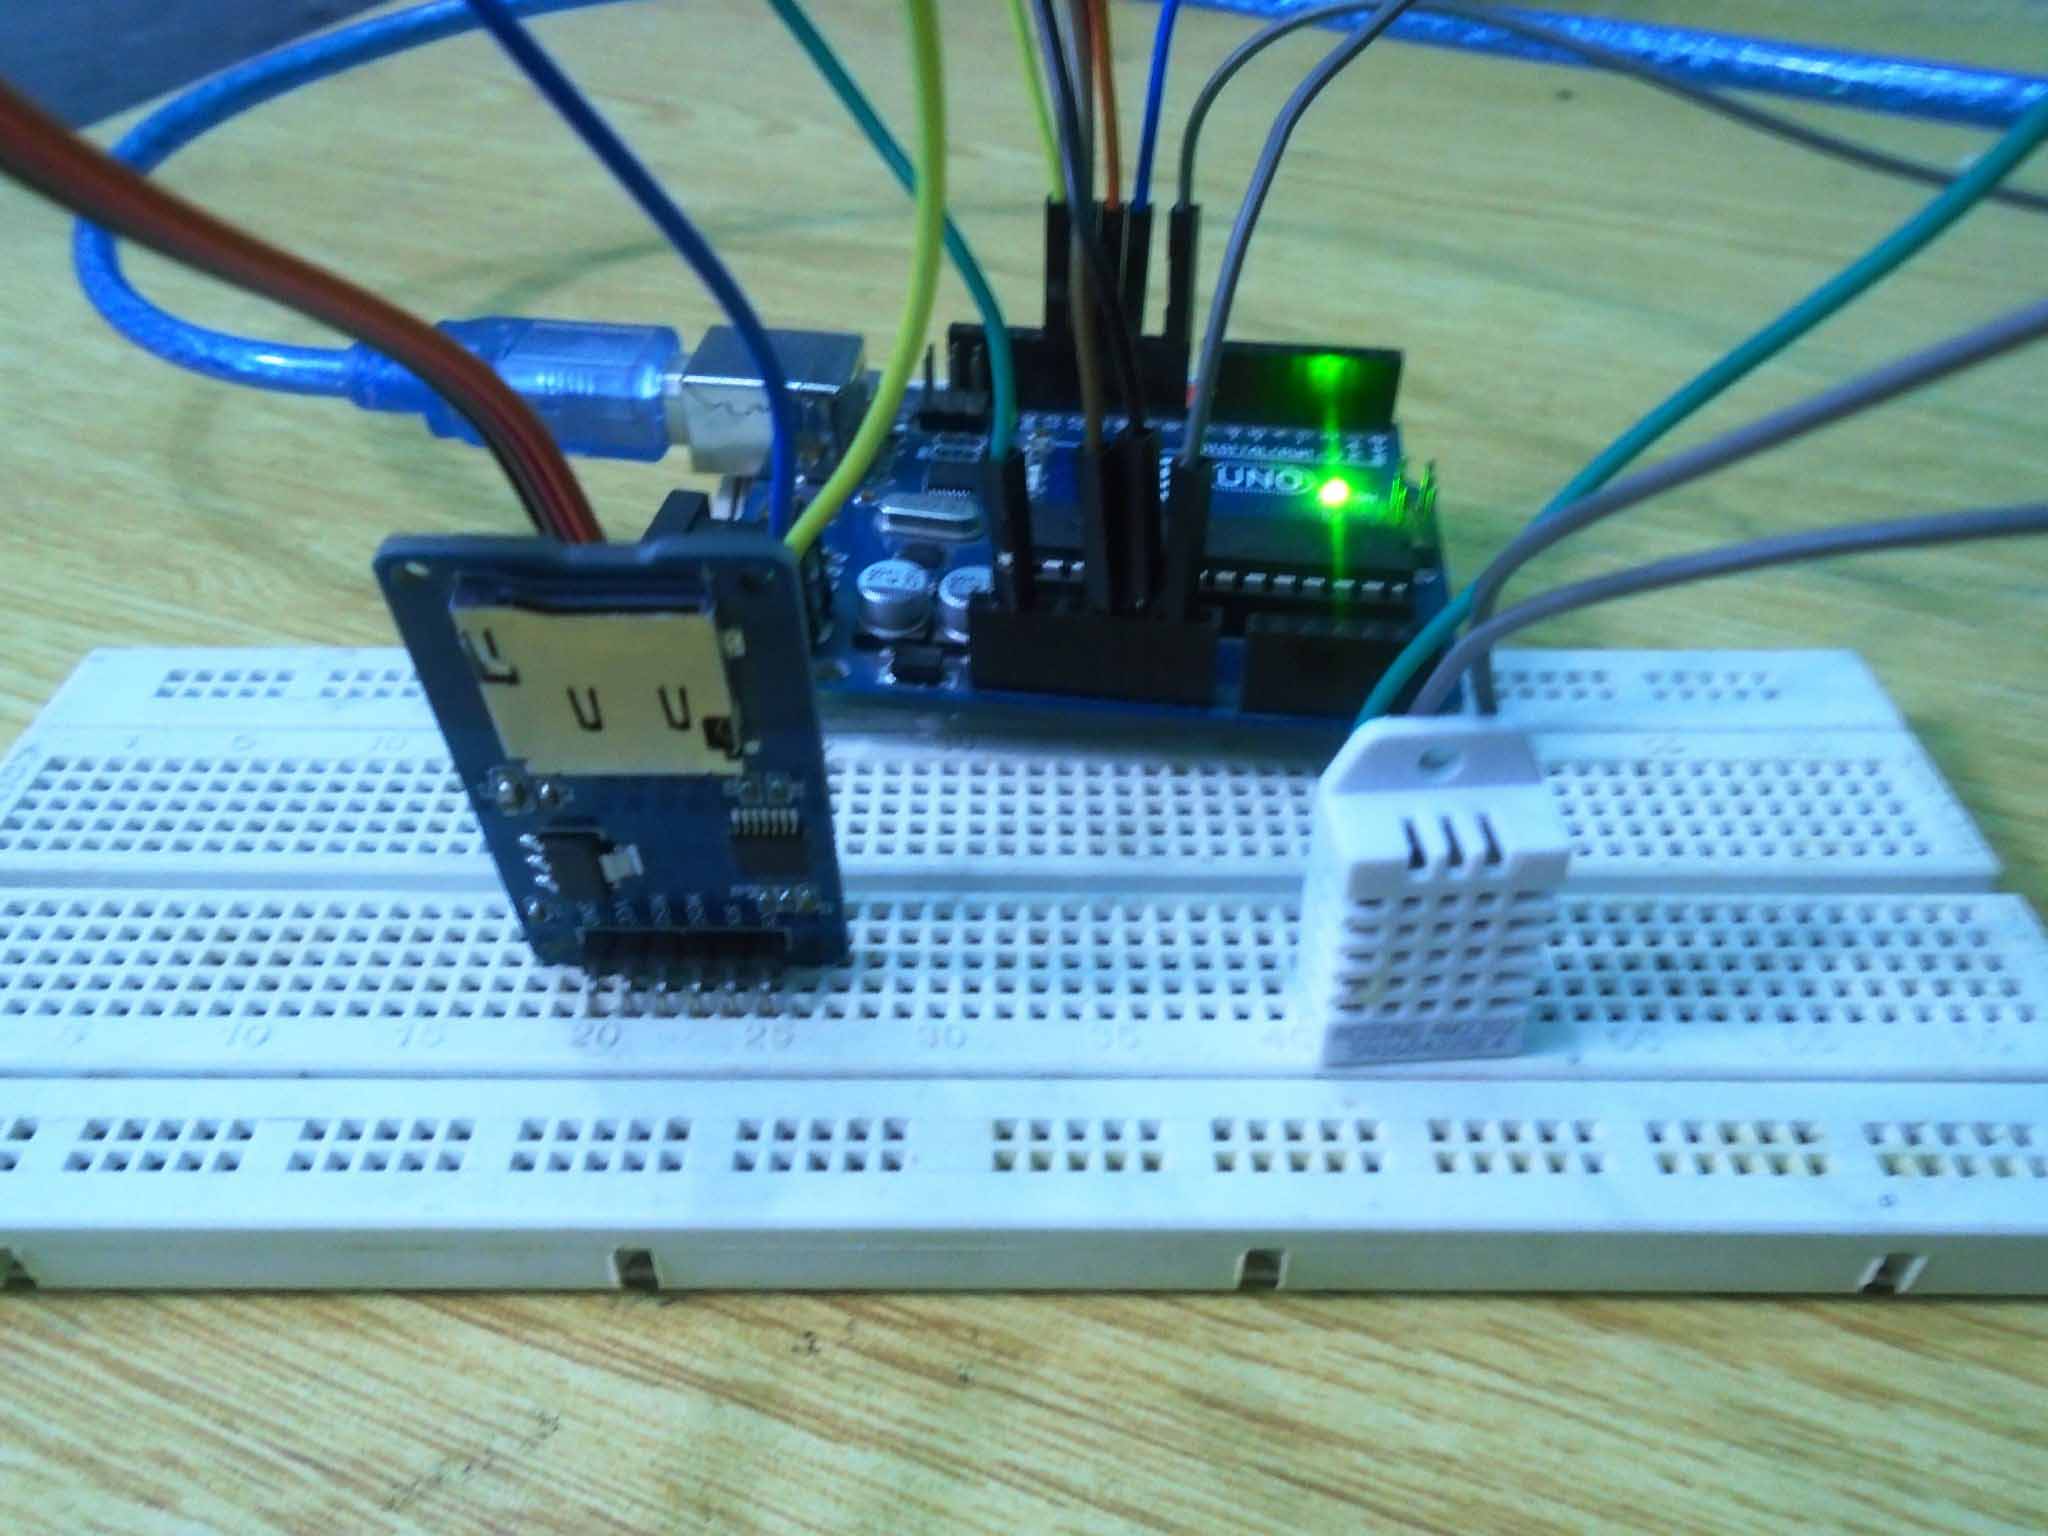
- Arduino Uno
- SD Card Module
- DHT22 Temperature and Humidity Sensor
- SD Card (Higher than 8GB)
- Breadboard
- Connecting wires
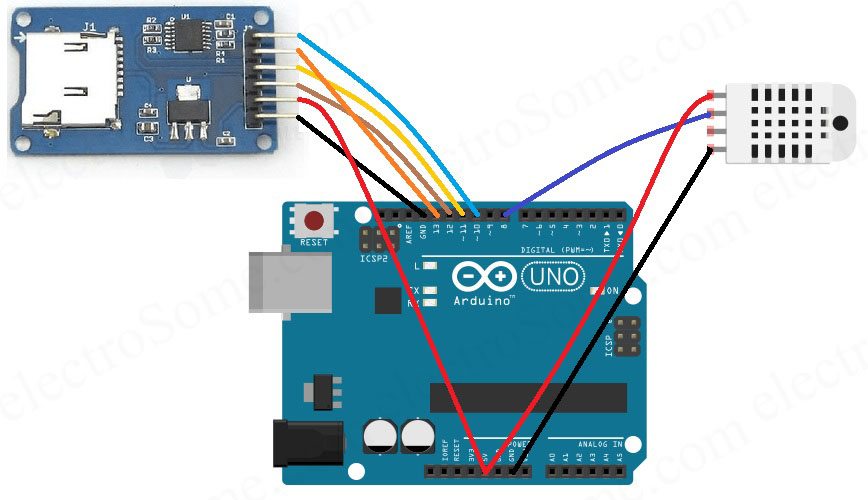
Circuit Diagram
Explanation
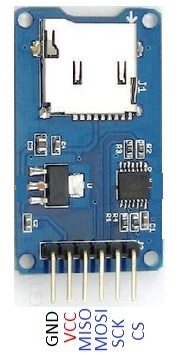
First of all, we will connect the SD Card module to the Arduino. Arduino can do read write operations on SD Card via SPI protocol. So we need to connect the SD card module to SPI pins of Arduino, which are pins 13, 12, 11 and 10. Since it is using SPI protocol, it won’t work if we connect SD card module to normal digital IO pins. So make connections as below.
- SD Card Module Ground to Arduino Ground
- VCC of the module to 5V output of Arduino
- MISO of module to pin 12 of Arduino
- MOSI of module to pin 11 of Arduino
- SCK of module to pin 13 of Arduino
- CS of module to pin 10 of Arduino
Then we can connect the DHT22 to the Arduino.
- Connect VCC of DHT22 to 5V output of Arduino
- Ground to ground of Arduino
- Data pin of DHT22 to pin 8 of Arduino
Program
#include <SD.h>
#include <SPI.h>
#include "DHT.h"

#define DHTPIN 8
#define DHTTYPE DHT22

long seconds=00;
long minutes=00;
long hours=00;

int CS_pin = 10;

DHT dht(DHTPIN, DHTTYPE);
File sd_file;

void setup()  {
  Serial.begin(9600);
  pinMode(CS_pin, OUTPUT);
  dht.begin();
  // SD Card Initialization
  if (SD.begin())  {
    Serial.println("SD card is initialized. Ready to go");
  }
  else  {
    Serial.println("Failed");
    return;
  }

  sd_file = SD.open("data.txt", FILE_WRITE);

  if (sd_file)  {
    Serial.print("Time");
    Serial.print(",");
    Serial.print("Humidity");
    Serial.print(",");
    Serial.print("Temperature_C");
    Serial.print(",");
    Serial.print("Temperature_F");
    Serial.print(",");
    Serial.println("Heat_index");

    sd_file.print("Time");
    sd_file.print(",");
    sd_file.print("Humidity");
    sd_file.print(",");
    sd_file.print("Temperature_C");
    sd_file.print(",");
    sd_file.print("Temperature_F");
    sd_file.print(",");
    sd_file.println("Heat_index");
  }
  sd_file.close(); //closing the file
}

void loop()  {
  sd_file = SD.open("data.txt", FILE_WRITE);
  if (sd_file)  {
    senddata();
  }
  // if the file didn't open, print an error:
  else  {
    Serial.println("error opening file");
  }
  delay(1000);
}

void senddata()  {
  for(long seconds = 00; seconds < 60; seconds=seconds+2)  {
    float temp = dht.readTemperature(); //Reading the temperature as Celsius and storing in temp
    float hum = dht.readHumidity();     //Reading the humidity and storing in hum
    float fah = dht.readTemperature(true);
    float heat_index = dht.computeHeatIndex(fah, hum);

    sd_file.print(hours);
    sd_file.print(":");
    sd_file.print(minutes);
    sd_file.print(":");
    sd_file.print(seconds);
    sd_file.print(",  ");
    sd_file.print(hum);
    sd_file.print(",    ");
    sd_file.print(temp);
    sd_file.print(",      ");
    sd_file.print(fah);
    sd_file.print(",      ");
    sd_file.println(heat_index);

    Serial.print(hours);
    Serial.print(":");
    Serial.print(minutes);
    Serial.print(":");
    Serial.print(seconds);
    Serial.print(",  ");
    Serial.print(hum);
    Serial.print(",    ");
    Serial.print(temp);
    Serial.print(",       ");
    Serial.print(fah);
    Serial.print(",      ");
    Serial.println(heat_index);

    if(seconds>=58)  {
      minutes= minutes + 1;
    }

    if (minutes>59)  {
      hours = hours + 1;
      minutes = 0;
    }

    sd_file.flush(); //saving the file

    delay(2000);
  }
  sd_file.close();   //closing the file
}
DHT22 Library
You need to manually add DHT library to Arduino IDE as it is not included by default. You can ignore it if you already added it. Otherwise you can do following steps for that.
- Download DHT Library from here : DHT Sensor Library.
- Open Arduino IDE.
- Go to Sketch >> Include Library >> Add .ZIP Library
- Select the downloaded ZIP file and press open.
Explanation
First of all, we have added libraries required for this project. Then we defined the DHT sensor type and pin to which it is connected.
#include <SD.h>       // Including SD Card Library
#include <SPI.h>      // Including SPI Library
#include "DHT.h"      // Including DHT Sensor Library

#define DHTPIN 8      // Declaring the pin to which DHT data pin is connected
#define DHTTYPE DHT22 // Selecting the type of DHT sensor used in this project

long seconds=00;      // For storing second
long minutes=00;      // For storing minute
long hours=00;        // For storing hour

int CS_pin = 10;      // Chip select pin of SD card module

DHT dht(DHTPIN, DHTTYPE); // Declaring DHT object
File sd_file;             // Declaring File object
In the setup function, we initialized the serial communication at 9600 baudrate. Here serial communication is used only for displaying logs in the Arduino Serial Monitor. The dht.begin() function will initialize the Arduino for reading data from DHT sensor. Similarly sd.begin() function will initialize the Arduino for write data to SD card module. After that we will open the file “data.txt” from SD card using sd.open() function. Then we will write titles ‘Time’, ‘Humidity’, ‘Temperature_C’, ‘Temperature_F’ and ‘Heat_index’ in it. After that we will close the connection to save the file.
void setup()  {
  Serial.begin(9600);
  pinMode(CS_pin, OUTPUT);
  dht.begin(); // Initialize the Arduino for reading data from DHT sensor
  // SD Card Initialization
  if (SD.begin())  {
    Serial.println("SD card is initialized. Ready to go");
  }
  else  {
    Serial.println("Failed");
    return;
  }

  sd_file = SD.open("data.txt", FILE_WRITE);

  if (sd_file)  {
    Serial.print("Time");
    Serial.print(",");
    Serial.print("Humidity");
    Serial.print(",");
    Serial.print("Temperature_C");
    Serial.print(",");
    Serial.print("Temperature_F");
    Serial.print(",");
    Serial.println("Heat_index");

    sd_file.print("Time");
    sd_file.print(",");
    sd_file.print("Humidity");
    sd_file.print(",");
    sd_file.print("Temperature_C");
    sd_file.print(",");
    sd_file.print("Temperature_F");
    sd_file.print(",");
    sd_file.println("Heat_index");
  }
  sd_file.close(); //closing the file
}
In the loop function, we will open the SD card “data.txt” file again. If it is opened successfully we will call senddata() function, otherwise it will show ‘error opening file’ in the serial monitor.
void loop()  {
  sd_file = SD.open("data.txt", FILE_WRITE);
  if (sd_file)  {
    senddata();
  }
  // if the file didn't open, print an error:
  else  {
    Serial.println("error opening file");
  }
  delay(1000);
}
In the senddata() function, we have made a loop which will count the time. Then we have read the temperature, humidity from DHT22 sensor and heat index is calculated. After storing these values in the variables, we will write these values to the SD card file. After that we will call sd_file.flush() to ensure that all data is stored in the SD card. These steps are repeated with a delay of 2 seconds.
void senddata()  {
  for(long seconds = 00; seconds < 60; seconds=seconds+2)  {
    float temp = dht.readTemperature(); //Reading the temperature as Celsius and storing in temp
    float hum = dht.readHumidity(); //Reading the humidity and storing in hum
    float fah = dht.readTemperature(true);
    float heat_index = dht.computeHeatIndex(fah, hum);

    sd_file.print(hours);
    sd_file.print(":");
    sd_file.print(minutes);
    sd_file.print(":");
    sd_file.print(seconds);
    sd_file.print(",  ");
    sd_file.print(hum);
    sd_file.print(",    ");
    sd_file.print(temp);
    sd_file.print(",      ");
    sd_file.print(fah);
    sd_file.print(",      ");
    sd_file.println(heat_index);

    Serial.print(hours);
    Serial.print(":");
    Serial.print(minutes);
    Serial.print(":");
    Serial.print(seconds);
    Serial.print(",  ");
    Serial.print(hum);
    Serial.print(",    ");
    Serial.print(temp);
    Serial.print(",       ");
    Serial.print(fah);
    Serial.print(",      ");
    Serial.println(heat_index);

    if(seconds>=58)  {
      minutes= minutes + 1;
    }

    if (minutes>59)  {
      hours = hours + 1;
      minutes = 0;
    }

    sd_file.flush(); //saving the file

    delay(2000);
  }
  sd_file.close(); //closing the file
}
Importing Logs to Excel
For viewing or evaluating the logged data, you can take the SD card from the module and connect it to a PC via a SD card reader.
- Open Microsoft Excel
- Press Office button or File
- Click Open
- Select the file from the SD card and open it.
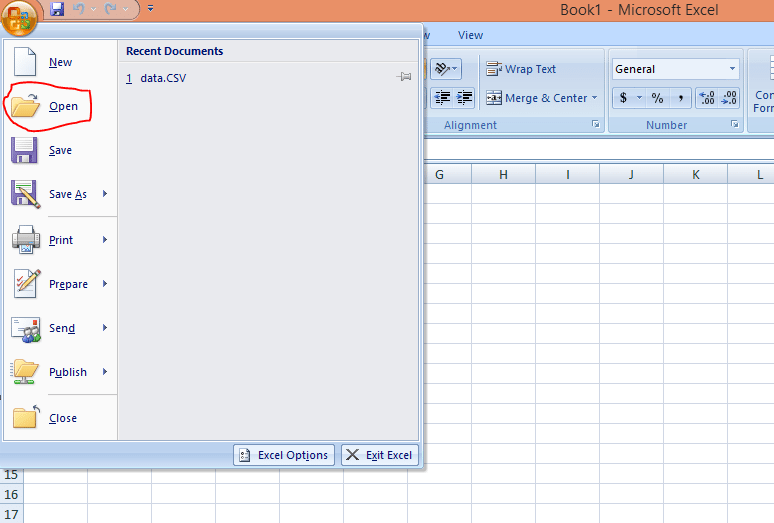
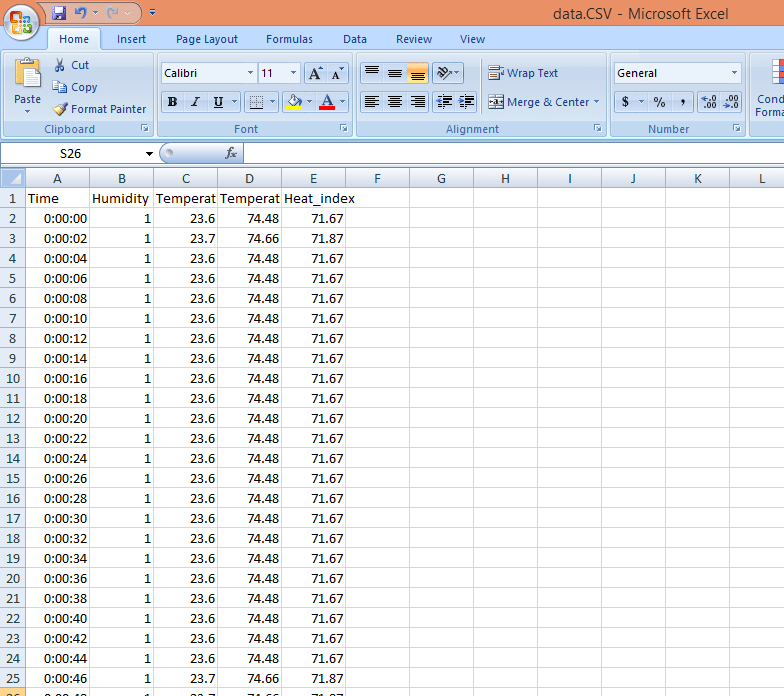
After opening the file, all data will be shown on the screen. Now we can plot graphs by using these values.
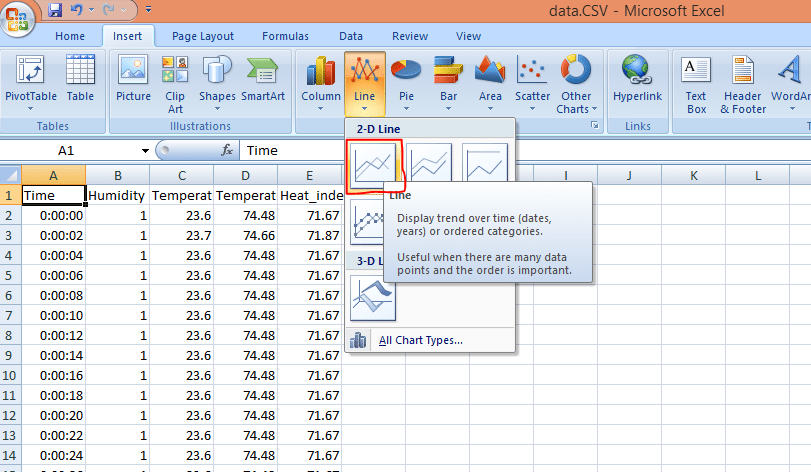
Generating a Graph
- Go to Insert tab
- Click on Line option
- Select 2D Line
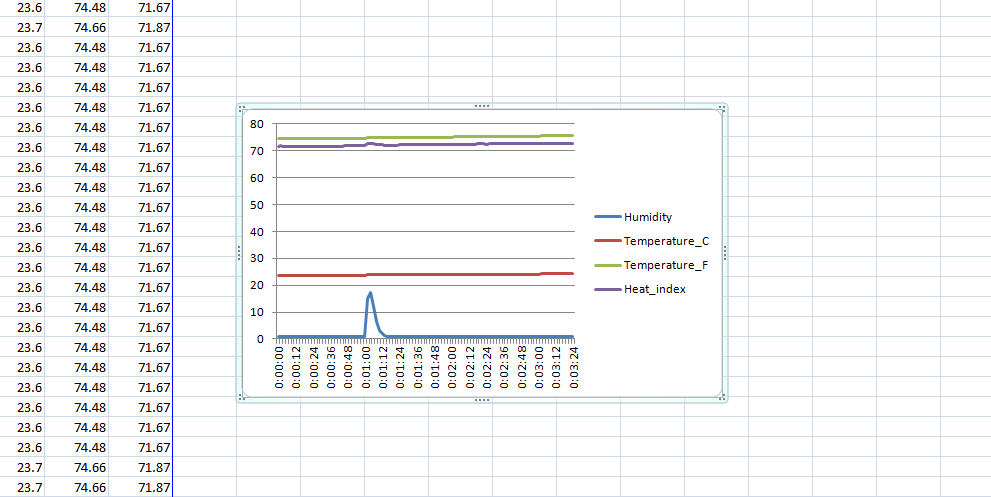
The graph will look like this. You can also customize this graph by using other options.

Thank you for this Project 🙂
Thanks for the help. I deleted everything, started fresh and now everything is working perfectly!
Looks like you have duplicate libraries.. I recommend completely uninstall arduino and start fresh.
After trying to verify the code, I get this error message:
Arduino: 1.8.12 (Windows Store 1.8.33.0) (Windows 10), Board: “Arduino Uno”
In file included from C:UsersreinhOneDriveDocumentsArduinosketch_mar18asketch_mar18a.ino:2:0:
Multiple libraries were found for “DHT.h”
C:UsersreinhOneDriveDocumentsArduinolibrariesDHT-sensor-library-master/DHT_U.h:36:10: fatal error: Adafruit_Sensor.h: No such file or directory
Used: C:UsersreinhOneDriveDocumentsArduinolibrariesDHT-sensor-library-master
#include
Not used: C:UsersreinhOneDriveDocumentsArduinolibrariesDHT_sensor_library
^~~~~~~~~~~~~~~~~~~
compilation terminated.
exit status 1
Error compiling for board Arduino Uno.
This report would have more information with
“Show verbose output during compilation”
option enabled in File -> Preferences.
anyone knows the solution to my problem?
Good day, what can I add to this code to control a relay to close when the humidity exceeds 30%
You have to use the first version of the lib
😀
I’d like to have the arduino take the Temp and RH% values and convert them to VPD, how would I do that?
how can we connect the soil sensor in this so that we are able to see the moisture content of the soil also?
Make sure all your Libraries are in the right place. It looks like the program was unable to find the adafruit sensor library. Did you download it?
how to control led or relay from internet using html or any other sources from esp8266 with arduino programming ??
no pls help me
did you solve this problem?
yes Bro..
did u get the solution for this
its giving error – exit status 1
Error compiling for board Arduino/Genuino Uno.
Please Help Me..
Arduino: 1.8.1 (Windows 7), Board: “Arduino/Genuino Uno”
In file included from C:UsersLabDocumentsArduinolibrariesDHT-sensor-library-masterDHT_U.cpp:22:0:
C:UsersLabDocumentsArduinolibrariesDHT-sensor-library-masterDHT_U.h:25:29: fatal error: Adafruit_Sensor.h: No such file or directory
#include
^
compilation terminated.
exit status 1
Error compiling for board Arduino/Genuino Uno.