

Updating Sensor Data to Google Spreadsheet using ESP8266 – IoT Project
Contents
In IoT applications, the monitored sensor data needs to be recorded. This data logging is important for data analytics. So in this tutorial, we will record the sensor captured data in a Google spreadsheet.
Components Required
- ESP8266
- 10KΩ Potentiometer
- Breadboard
- USB Cable
- Connecting Wires
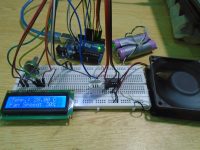
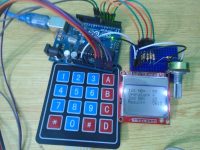
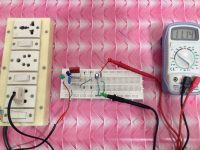
Hardware
Circuit Diagram

Software
Google Spreadsheet Creation
- Login to your Gmail account and open Google Drive.
- Create a new folder, name it and open the folder.
- Inside the folder right click and click on Google Sheets.
- Google sheet will be created inside the folder, Spreadsheet will open in new tab and name the spreadsheet according to your wish.
- Specify the fields in spreadsheet tables like id, time, date and value.
- Go to Tools, click on Script editor (in new tab Script editor will open).

Updating Sensor Data to Google Spreadsheet using ESP8266 – Google Spreadsheet – Script editor - Name the Script editor and write the below code in a script editor.
function doGet(e)
{
  var mo = e.parameter.func;
  if(mo == "addData")
  {
    var stat = add_data(e);
    if(stat == 1)
    {
      var result =
      {
        status : true
      };
      return ContentService.createTextOutput(JSON.stringify(result)).setMimeType(ContentService.MimeType.JSON);
    }
  }
}
function add_data(e)
{
  var sheet = SpreadsheetApp.openByUrl('https://docs.google.com/spreadsheets/d/182EnOR4vF5eVs4wGD-zOn7pKy_6BMpED8ApjIGh0C9Q/edit#gid=0');
  var lastVal = sheet.getRange("A1:A").getValues();
  var id = lastVal.filter(String).length;

  var CurrentDate = new Date();
  var Date_ = Utilities.formatDate(CurrentDate, "IST", "dd/MM/YYYY");
  var Time_ = Utilities.formatDate(CurrentDate, "IST", "HH:mm:ss");

  sheet.appendRow([id, Date_, Time_, e.parameter.val]);
  return 1;
}
- Save the code
- Go to publish and click on Deploy as web app.
- Under Deploy as web app, enter Project version as my function and select anyone, even anonymous for the access to the app, click on Deploy icon
- It will ask for permission so we have to give permission by click on “Give permission icon”
- Select your google account and click on allow to give permission.
- You will get web app URL, note down that URL and click ok.
Programming ESP8266
Arduino Code
#include <ESP8266WiFi.h>
#include <WiFiClientSecure.h>

const char *ssid = "WiFi SSID";
const char *password = "WiFi PASSWORD";
const char* host = "script.google.com";
String url;

void setup()
{
  Serial.begin(115200);
  delay(100);
  Serial.println();
  Serial.println();
  Serial.print("Connecting to ");
  Serial.println(ssid);

  WiFi.begin(ssid, password);
  while (WiFi.status() != WL_CONNECTED)
  {
    delay(500);
    Serial.print(".");
  }

  Serial.println("");
  Serial.println("WiFi connected");
  Serial.println("IP address: ");
  Serial.println(WiFi.localIP());
  Serial.print("Netmask: ");
  Serial.println(WiFi.subnetMask());
  Serial.print("Gateway: ");
  Serial.println(WiFi.gatewayIP());
}

void loop()
{
  Serial.print("connecting to ");
  Serial.println(host);

  WiFiClientSecure client;

  const int httpPort = 443;
  if (!client.connect(host, httpPort))
  {
    Serial.println("connection failed");
    return;
  }

  float t = analogRead(A0);

  url = "/macros/s/AKfycbyvGjcryd7c5uNeX6dkleZhmjDKyTrs1L9Lf3kWlPhTZDn9JPrH/exec?func=addData&val="+ String(t);
  Serial.print("Requesting URL: ");
  Serial.println(url);

  client.print(String("GET ") + url + " HTTP/1.1\r\n" +
               "Host: " + host + "\r\n" +
               "Connection: close\r\n\r\n");
  delay(500);
  String section="header";
  while(client.available())
  {
    String line = client.readStringUntil('\r');
    Serial.print(line);
  }
  Serial.println();
  Serial.println("closing connection");
  delay(6000);
}
Working
The ESP8266 reads the sensor data from analog pin A0 and updates that sensor captured data to Google Spreadsheet. So the monitored data will be recorded in a Google Spreadsheet we can use it further for data analytics.
Practical Implementation
Hardware

Google Spreadsheet


Thanks, corrected.
for the id
lenght; should be length;
Great idea! Thanks for sharing. Can you please share the libraries.
where can I find wificlientsecure library?
can you plese tell me ,how did you get const char* fingerprint = “fd 85 80 08 94 28 7b 0e 2f 13 06 09 d7 fd f0 23 40 7c c4 34”;
and what is the use of that.